
The best graphite paper selection depends on your surface, pressure, and transfer detail needs.
Choosing the right graphite paper selection can save time, reduce smudges, and make your transfer lines cleaner and more accurate. If you’ve ever had a drawing shift, smear, or leave marks that were too dark to erase, you already know how much the right graphite paper matters. In this guide, I’ll walk you through graphite paper selection with practical tips, real-world advice, and the key factors that help you get better results on paper, wood, fabric, canvas, and more.

What Graphite Paper Is and Why It Matters
Graphite paper is a transfer sheet used to copy designs from one surface to another. It works by placing the sheet between your original sketch and your working surface, then tracing over the lines you want to transfer. The pressure leaves a clean mark, which makes it useful for art, crafts, woodworking, sewing, sign painting, and pattern transfer.
Good graphite paper selection matters because not all transfer sheets behave the same way. Some are darker, some are cleaner, and some work better on porous surfaces. I’ve seen people use the wrong sheet on rough wood and wonder why the lines looked faint or patchy. The problem usually is not the drawing. It is the graphite paper selection.
Graphite paper is different from carbon paper. Graphite sheets usually produce softer marks and are easier to erase, which is why many artists and makers prefer them. That small difference can make a big impact when you need clean results.
How Graphite Paper Works
Graphite paper uses a thin coating of graphite on one side of the sheet. When you press on the top layer with a pencil, stylus, or pen, the graphite transfers to the surface below. The result is a copy of your lines without the need to redraw the design by hand.
The process is simple, but the outcome depends on a few things:
- The pressure you apply
- The smoothness of the surface
- The thickness of the graphite coating
- Whether the sheet is reusable
- The type of paper or material you are tracing onto
From experience, I can say that light pressure is usually enough for most art transfers. Press too hard, and you risk making lines that are difficult to remove later. Press too softly, and the design may not show up clearly. Graphite paper selection is really about finding that balance.
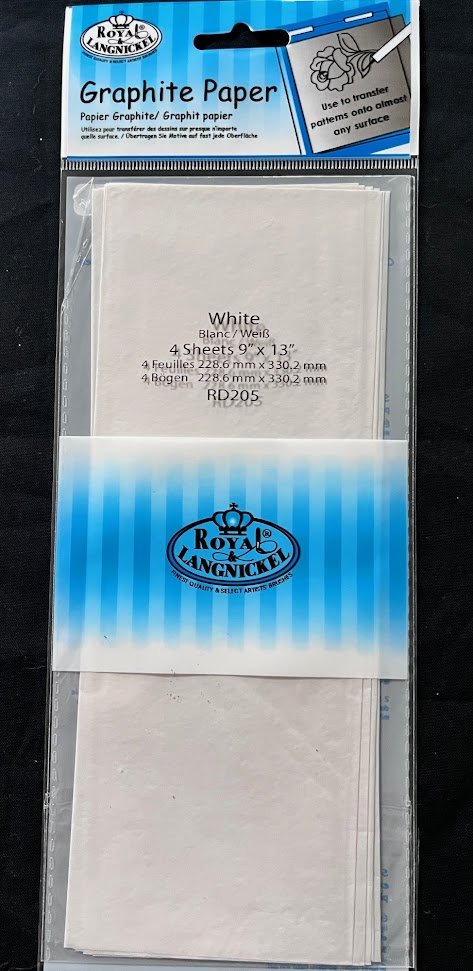
Key Factors in Graphite Paper Selection
Surface Type
The surface you are transferring onto should be your first concern. Smooth paper, canvas, fabric, wood, and ceramics all react differently.
- Smooth paper: Works well with light graphite transfer sheets
- Canvas: Often needs a slightly darker transfer for visibility
- Wood: May need a stronger mark because grain can interrupt the line
- Fabric: Usually needs transfer paper made for textiles
- Painted surfaces: Require caution because graphite can be hard to remove
One mistake I made early on was using a very light sheet on rough plywood. The design showed up in spots, but the grain swallowed some of the line. Since then, I always match the graphite paper selection to the surface texture first.
Darkness Level
Graphite paper comes in different darkness levels. Some are light gray, while others leave darker marks. The right choice depends on how visible you need the line to be.
- Light graphite: Best for detailed drawings and surfaces where cleanup matters
- Medium graphite: A good all-purpose option for most projects
- Dark graphite: Helpful for rough, dark, or textured surfaces
If your surface is pale and smooth, a lighter sheet may be enough. If you are working on wood or fabric, a darker option may save you time. The goal is to choose a sheet that is visible without being too hard to erase.
Reusability
Some graphite paper sheets can be reused several times, while others are more limited. Reusable sheets can be cost-effective if you do a lot of transfers. Single-use sheets may offer better consistency for one-time work.
I usually tell beginners to think about volume. If you transfer the same pattern repeatedly, reusability matters. If you need a clean, one-off result, consistency may matter more than saving a few sheets.
Cleanability
Graphite marks are usually easier to remove than carbon marks, but not all graphite papers erase the same way. On some surfaces, the marks lift cleanly. On others, especially porous or textured materials, the marks can sink in.
Before starting a large project, test a small area first. That small test can prevent a big headache later. In my own work, I’ve avoided more than one ruined piece by checking how the graphite behaved on a scrap sample.
Sheet Size
Graphite paper comes in different sizes, from small craft sheets to larger transfer formats. The size you choose should fit your project.
- Small sheets are good for jewelry, cards, and small sketches
- Medium sheets work well for most art and hobby projects
- Large sheets are better for wall art, furniture design, and bigger patterns
A sheet that is too small can force you to tape and reposition it, which increases the chance of shifting. That is one of the sneakiest mistakes in graphite paper selection.
Best Uses for Graphite Paper
Graphite paper is flexible, which is one reason people keep reaching for it. It is useful in many creative and practical settings.
- Artists use it to transfer sketches to canvas or illustration paper
- Woodworkers use it to trace templates and lettering
- Sewers use it to mark pattern outlines
- Crafters use it for sign making and DIY decor
- Hobbyists use it for embroidery and calligraphy guides
The best graphite paper selection depends on the job. A transfer sheet that works great for art may not be ideal for embroidery or wood signs. Think of it like shoes: the right pair depends on where you plan to walk.
How to Choose the Right Graphite Paper
1. Start with the surface
Ask yourself what you are drawing on. Smooth paper needs less transfer power than textured wood or canvas.
2. Decide how dark you want the line
If you need faint guide marks, use a lighter sheet. If you need clear, bold transfer lines, go darker.
3. Match the project type
- Art and illustration: Choose clean, light-to-medium graphite
- Woodworking: Choose medium or dark graphite
- Fabric projects: Use a product made for fabric or test carefully
- Craft patterns: Choose a sheet that is easy to reposition
4. Check eraseability
If cleanup matters, go for a sheet that lifts easily. This is especially important for visible art surfaces.
5. Consider sheet size and count
Buy enough for your workflow. Bigger projects or repeated transfers often need larger packs.
That’s the basic formula I use when helping someone with graphite paper selection. It keeps the choice simple and saves a lot of trial and error.
Common Mistakes to Avoid
Even good tools can give poor results when used the wrong way. These are the most common mistakes I see with graphite paper selection.
- Using the wrong sheet darkness for the surface
- Pressing too hard and creating marks that are hard to remove
- Skipping a test on scrap material
- Reusing damaged sheets that no longer transfer evenly
- Choosing a sheet that is too small for the project
- Assuming all graphite paper works the same on every surface
A big lesson I learned is that “good enough” often becomes “not good enough” once the project is finished. A few extra minutes spent testing the transfer can protect hours of work.
Graphite Paper vs Carbon Paper
People often confuse graphite paper with carbon paper, but they are not identical.
- Graphite paper: Softer marks, easier to erase, better for many art projects
- Carbon paper: Darker marks, often harder to remove, sometimes used for office or industrial tasks
If the transfer is going to stay hidden under paint, fabric stitching, or another layer, carbon paper can work. But if the line may remain visible, graphite paper is usually the safer choice. That is why graphite paper selection is so important for artists and makers who value clean finishing.
Practical Tips for Better Transfer Results
A few small habits can improve your results right away.
- Tape the sheets lightly so they do not shift
- Use a stylus or dull pencil for more controlled pressure
- Test the pressure on a corner first
- Keep your hands clean to avoid smudges
- Work on a flat, stable surface
- Lift the top page slowly to check the transfer before removing everything
I also recommend storing graphite sheets flat. Bent or wrinkled sheets can transfer unevenly. It sounds minor, but in practice it makes a difference.
Who Benefits Most from the Right Graphite Paper Selection
The right graphite paper selection helps a wide range of users.
- Artists who want accurate line transfer
- DIY makers who need repeatable patterns
- Woodworkers who want crisp templates
- Sewers and embroiderers who need design guides
- Teachers and students working on crafts or tracing exercises
The real benefit is confidence. When the transfer works the way you expect, the rest of the project feels easier. You stop fighting the tool and start focusing on the work.
Materials and Surface Compatibility
Graphite paper performs best when the transfer sheet matches the material.
- Paper: Usually easy to transfer and erase
- Cardstock: Works well with most graphite papers
- Canvas: May need medium to dark transfer
- Wood: Often needs a stronger mark and a careful test
- Fabric: Best with surface-friendly products made for textiles
- Ceramics and glass: Use caution and test first, since marks may not erase well
Not every surface plays nicely with graphite. Porous materials absorb the marks faster, while slick materials may resist them. That’s why graphite paper selection is really about compatibility, not just convenience.
Frequently Asked Questions
What is the best graphite paper selection for beginners?
A medium-strength graphite paper is usually the best place to start. It works on many surfaces and gives you enough visibility without being too dark.
Can graphite paper be erased easily?
Usually yes, especially on smooth paper and some art surfaces. On wood, canvas, or textured materials, the marks may be harder to remove, so testing is important.
Is graphite paper reusable?
Some graphite sheets are reusable, but the quality and transfer strength can drop over time. If you use them often, inspect the sheet for worn spots before starting a new project.
What is the difference between graphite paper and tracing paper?
Tracing paper is used to see or copy a design, while graphite paper is used to transfer that design onto another surface. They work together in many projects, but they serve different jobs.
How do I know which graphite paper darkness to choose?
Choose based on the surface and how visible you need the line to be. Light sheets are good for delicate work, while darker sheets are better for rough or less absorbent surfaces.
Conclusion
Graphite paper selection becomes much easier when you focus on three things: the surface, the darkness level, and how clean you want the transfer to be. Once you understand those basics, you can avoid smudges, save time, and get cleaner results on your projects. The best choice is not always the darkest or the most expensive one. It is the one that fits your material and your goal.
If you are about to start a new project, test one sheet first and see how it behaves. That small step can make the whole process smoother and more satisfying. Try these tips on your next transfer, and if you found this guide helpful, explore more creative tool guides or leave a comment with your own graphite paper selection experience.