
Charcoal landscape drawing turns simple black marks into mood, depth, and atmosphere.
Charcoal landscape drawing is one of the most expressive ways to capture nature on paper. In my own experience, it rewards patience more than perfection, and that is what makes it so powerful. If you want to understand how artists build light, shadow, distance, and texture with charcoal landscape drawing, this guide will walk you through the full process in a clear, practical way.
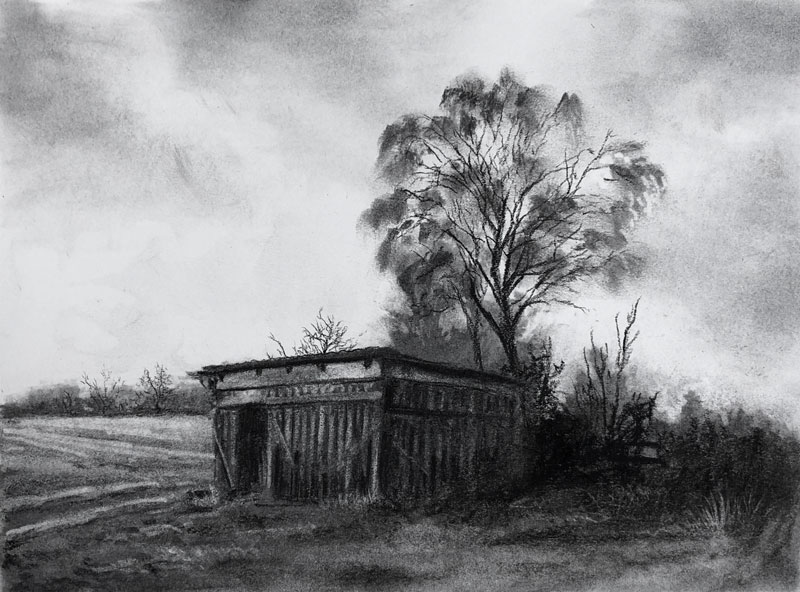
What Is Charcoal Landscape Drawing?
Charcoal landscape drawing is the art of creating outdoor scenes with charcoal sticks, pencils, or compressed charcoal on paper. Artists use it to show mountains, trees, skies, fields, roads, water, and other natural forms with rich contrast and soft tonal range.
What makes charcoal landscape drawing special is the way it handles light. A small lift of tone can suggest mist, sunlight, or faraway hills. A heavy dark stroke can make a tree line feel strong and dramatic. It is a medium that feels a little like weather itself, always shifting and alive.
Charcoal has been used for centuries because it is simple, direct, and honest. It lets you focus on value, shape, and composition instead of color. That is why so many art teachers still recommend charcoal landscape drawing to beginners and advanced artists alike.
Why Charcoal Works So Well for Landscapes
Charcoal landscape drawing is a natural fit because landscapes depend on contrast and atmosphere. You can show a wide sky, soft cloud edges, distant hills, and rough tree bark with one medium. The tonal control is strong, and that gives the drawing emotional weight.
Here are a few reasons artists love it:
- Strong value range makes light and dark areas easy to separate
- Soft blending helps create fog, clouds, and distant forms
- Quick mark-making is useful for sketching outdoor scenes on location
- Easy correction with kneaded erasers allows flexible editing
- Rich texture supports trees, rocks, grass, and soil
I have found that charcoal landscape drawing often feels less intimidating than color work. When you remove color from the equation, you start seeing structure more clearly. That shift can improve your observation skills faster than you might expect.
Essential Materials for Charcoal Landscape Drawing
Good tools do not have to be expensive, but they do matter. The right paper and charcoal can make charcoal landscape drawing much easier, especially when you are learning how to control tone and texture.
Charcoal Types
There are a few common forms of charcoal used in landscape work:
- Vine charcoal for light sketching and soft construction lines
- Willow charcoal for smooth marks and easy blending
- Compressed charcoal for deep blacks and stronger contrast
- Charcoal pencils for detail, edges, and tighter line control
Vine and willow charcoal are ideal if you want to build a drawing slowly. Compressed charcoal is better for final darks. Charcoal pencils are useful when you need to define branches, fences, or fine edges in a charcoal landscape drawing.
Paper and Support
Paper changes everything. In charcoal landscape drawing, a toothy surface holds particles better and gives the drawing more grip.
Choose paper that is:
- Medium to heavy weight
- Slightly textured
– Able to handle erasing and layering - Large enough for atmospheric detail if needed
I have made the mistake of using paper that was too smooth. The charcoal slid around, and the drawing looked weak no matter how hard I pushed it. Once I switched to textured paper, the whole process felt more stable and controlled.
Helpful Tools
A small kit often works best:
- Kneaded eraser for lifting highlights
- Vinyl eraser for stronger corrections
- Blending stump or tissue for smoothing areas
- Soft brush to remove dust
- Fixative to help preserve finished work
- Scrap paper to protect your hand and layers
Core Techniques That Shape a Strong Charcoal Landscape Drawing
A solid charcoal landscape drawing is built from a few basic techniques. These techniques help you control value, texture, and depth without overworking the surface.
Gesture and Blocking In
Start with loose shapes. Do not chase detail too early. First, place the big forms like sky, horizon, mountains, trees, or water.
This stage is about structure. Think of it like laying the bones of the scene. If the foundation is off, the whole charcoal landscape drawing will feel unstable later.
Layering Values
Value is the heart of charcoal landscape drawing. You need lights, mids, and darks to create form and mood.
Try this order:
- Map the lightest areas first
- Add middle tones across large shapes
- Deepen shadows where forms turn away from the light
- Reserve the darkest darks for anchors and contrast
Layering slowly helps you avoid muddy marks. It also gives the drawing a cleaner sense of space.
Blending With Purpose
Blending can be beautiful, but it should not erase the structure. In charcoal landscape drawing, soft blending works well for skies, distant hills, mist, and water reflections.
Use blending to:
- Smooth transitions in clouds
- Push background shapes farther away
- Soften edges in foggy conditions
- Create calm, quiet moods
Do not blend everything. Some sharp edges are needed to keep the scene alive. A rough tree line or sharp rock edge can make the whole drawing feel more real.
Erasing for Light
One of the best parts of charcoal landscape drawing is that erasing is not just correction. It is also a drawing tool.
Use lifting to create:
- Sunlight on clouds
- Reflected light on water
- Distant haze
- Highlights on tree trunks or rocks
- Thin branches cutting across a sky
I often tell students that erasing in charcoal is like carving light out of shadow. That mindset can change the way you draw.
How to Build Depth and Atmosphere
Depth is what makes a charcoal landscape drawing feel like a real place instead of a flat picture. Atmosphere is what makes it feel alive.
Use Atmospheric Perspective
Objects farther away should usually look lighter, softer, and less detailed. This effect is known as atmospheric perspective, and it is one of the most important ideas in landscape art.
To show distance:
- Lighten distant mountains
- Reduce contrast in far trees
- Soften edges in the background
- Keep foreground details darker and sharper
This principle is supported by traditional drawing instruction and visual perception research. The human eye reads softer contrast as distance, so charcoal is perfect for this kind of illusion.
Control Edge Quality
Edges help the viewer understand what is near and what is far. Hard edges pull attention forward. Soft edges push forms back.
In charcoal landscape drawing:
- Use hard edges for foreground rocks, branches, and tree trunks
- Use softer edges for hills, clouds, and distant woods
- Break some edges so forms do not look cut out
This small habit can make a big difference. I used to outline too much, and the drawings looked stiff. Once I started varying edges, the scenes felt more natural and breathable.
Use Contrast Wisely
Not every area should be equally dark. Strong contrast should be saved for the most important focal points.
A good landscape often has:
- Dark foreground shapes
- Medium values in the middle distance
- Light, soft tones in the background
This value structure guides the eye through the drawing without forcing it. It is one of the cleanest ways to create depth in charcoal landscape drawing.
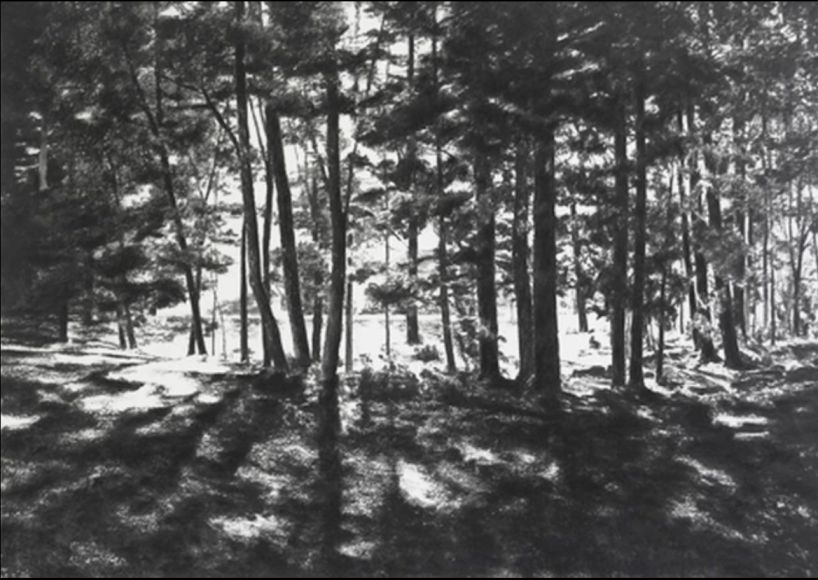
Step-by-Step Charcoal Landscape Drawing Process
A clear process keeps charcoal landscape drawing from feeling overwhelming. The steps below work well whether you are drawing from a photo, plein air, or imagination.
1. Choose a Simple Scene
Start with a scene that has a clear horizon, one main focal area, and a few large shapes. Good beginner subjects include a lone tree, a field with distant hills, or a path leading into the distance.
Avoid scenes with too many tiny details at first. Charcoal landscape drawing is easier when the composition is simple and strong.
2. Sketch the Big Shapes
Use vine charcoal or a charcoal pencil to place the horizon, mountains, trees, and major landforms. Keep the lines loose and light.
Focus on proportion and placement. Ask yourself:
- Where is the darkest area?
- What shape leads the eye?
- Is the horizon too high or too low?
This stage should feel open, not exact.
3. Establish the Light and Dark Pattern
Before drawing details, block in the major shadows. This helps you see the whole scene as a set of value masses.
A useful trick is to squint at your reference. When you do that, the scene simplifies into larger shapes. That is exactly how you want to think about charcoal landscape drawing.
4. Build the Background
Work from far to near. Start with the sky, distant hills, and far trees. Keep these areas softer and lighter.
For skies, use broad strokes and gentle blending. For distant land, use light pressure and minimal detail. This gives the drawing a sense of space right away.
5. Develop the Midground
The midground often holds paths, fields, fences, or tree clusters. This area connects the distance to the foreground, so it needs enough detail to feel real, but not so much that it competes with the front of the drawing.
Add texture here with controlled marks. Let the forms start to gain weight.
6. Finish the Foreground
Foreground forms should be the darkest and clearest. These are the areas where you can add bark texture, rock cracks, grass blades, or strong shadow shapes.
This is where charcoal landscape drawing often becomes most dramatic. The foreground acts like a stage frame for the scene.
7. Add Final Accents and Highlights
At the end, sharpen the most important areas. Lift a few bright spots with an eraser. Reinforce the darkest darks if needed.
Try not to polish everything equally. A good charcoal landscape drawing feels alive because some marks stay loose and some areas stay soft.
Common Mistakes to Avoid
Even experienced artists slip into a few traps. I have made most of these myself, usually when I was trying too hard to finish fast.
Overblending
Too much blending can flatten the drawing. The scene loses texture and turns muddy.
Better approach:
- Blend only where softness helps the image
- Leave some charcoal marks visible
- Keep important shapes clear
Making Everything Equally Dark
If every part has the same contrast, the drawing loses depth. Save your strongest darks for the foreground or focal point.
Adding Detail Too Early
Detail before structure is a common mistake. It usually leads to reworking and frustration.
Instead, build the scene from large shapes first. Then add detail only after the composition is stable.
Ignoring the Paper
Charcoal needs paper with tooth. If the paper is too smooth, the medium will not layer well.
Forgetting the Light Source
A landscape must have believable light. Decide where the light is coming from before you begin shading.
Benefits of Charcoal Landscape Drawing
Charcoal landscape drawing offers more than a finished image. It also builds skills that carry over into painting, sketching, and even digital art.
It Improves Observation
You learn to notice value, edges, and shape. That makes you a better visual thinker overall.
It Builds Confidence
Because charcoal is forgiving, it helps artists take risks. You can erase, lift, and rebuild without fear.
It Strengthens Composition Skills
Working in black and white forces you to think about structure. This is useful in any art medium later.
It Helps You Capture Mood
Charcoal is excellent for stormy skies, quiet woods, winter fields, and twilight scenes. It can express emotion fast.
Charcoal Landscape Drawing From Life vs From Photos
Both approaches are useful, but they teach different things.
Drawing From Life
Drawing outdoors helps you notice real light changes, scale, and atmosphere. It is the best way to understand how nature actually looks.
Challenges include:
- Changing light
- Wind and weather
- Limited time
- Harder setup
Drawing From Photos
Photos are easier to control and can be helpful for beginners. They allow more time to study values and refine details.
Still, photos can flatten depth and hide subtle light shifts. When possible, it helps to use a photo as a guide while also studying real landscapes.
How to Practice Charcoal Landscape Drawing Faster
Practice works best when it is focused. Short, regular sessions often help more than one long effort.
Try these exercises:
- Draw five tiny landscape thumbnails in 10 minutes
- Practice one sky study with only three value levels
- Make a tree line study using only charcoal and eraser
- Copy the light pattern of a favorite landscape photo
- Sketch the same scene at sunrise and sunset to compare mood
From my own work, the fastest growth came from repetition. Not big heroic drawings, just small studies done often. That steady practice built confidence and made larger charcoal landscape drawing projects much easier.
Tips for Better Results Every Time
These practical habits can improve your charcoal landscape drawing right away:
- Keep a paper towel nearby to clean your fingers
- Turn your drawing upside down if the proportions feel off
- Use the side of the charcoal stick for broad shapes
- Save the darkest marks for the final stage
- Protect finished areas with a clean sheet of paper under your hand
- Step back often to check the whole composition
One small tip that changed my process was stepping away for a few minutes before final adjustments. Charcoal can trick your eye up close. A quick break helps you spot what the drawing really needs.
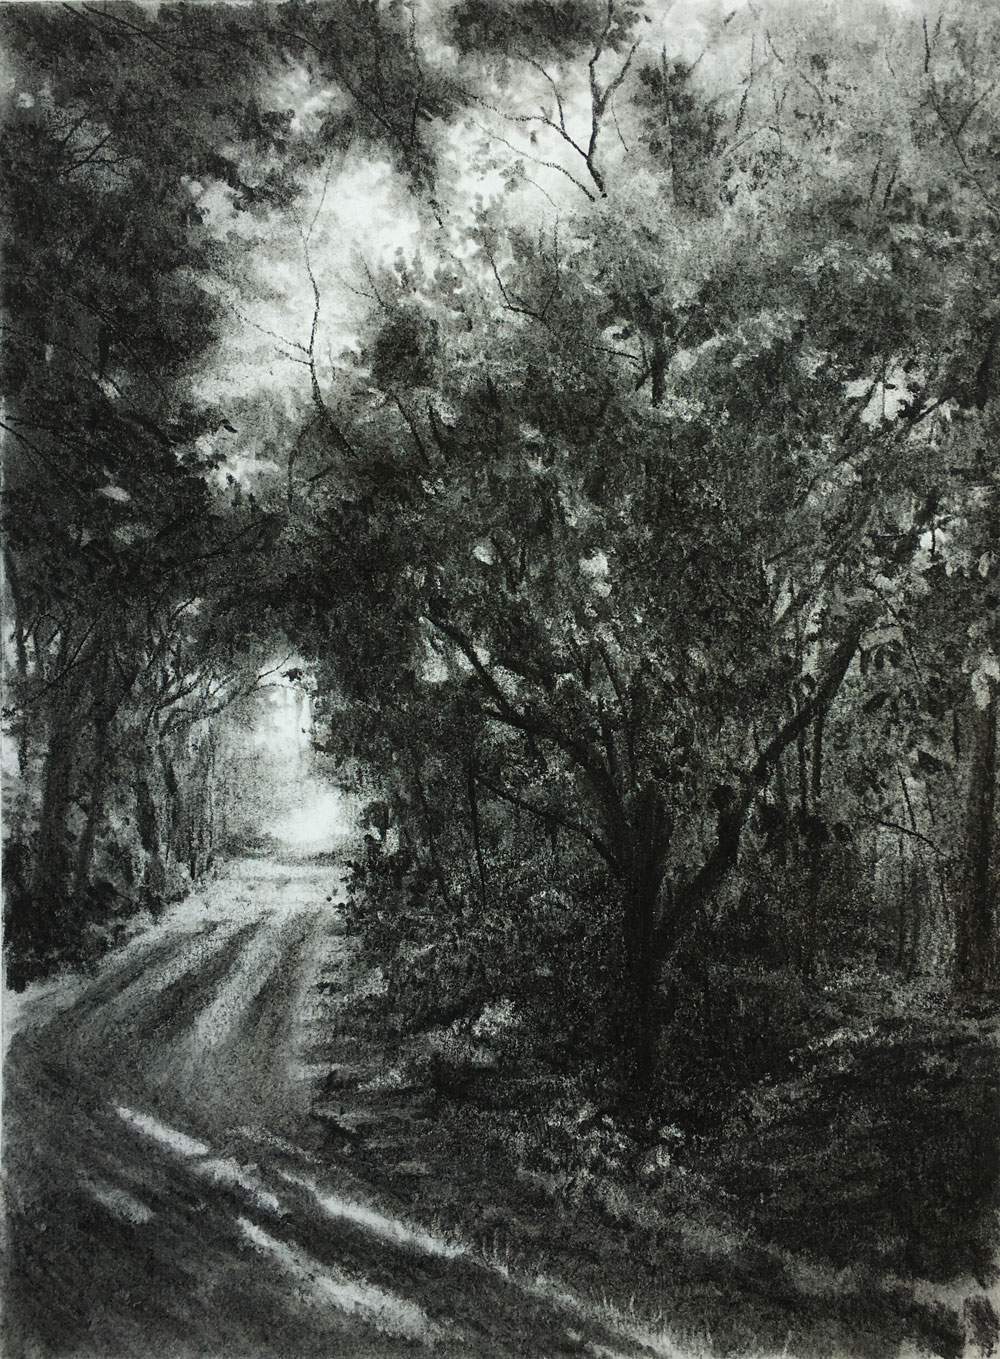
Frequently Asked Questions of charcoal landscape drawing
What is the best charcoal for landscape drawing?
Vine charcoal is great for loose sketching, while compressed charcoal gives deeper blacks and stronger contrast. Many artists use both in the same charcoal landscape drawing for better control.
How do I make a charcoal landscape drawing look realistic?
Focus on value, edge control, and atmospheric perspective. Keep distant areas softer and lighter, and reserve darker details for the foreground.
What paper is best for charcoal landscape drawing?
Textured paper with enough tooth is usually best because it holds charcoal well. A medium to heavy-weight paper works especially well for layering and erasing.
Can beginners learn charcoal landscape drawing easily?
Yes, because charcoal is forgiving and easy to correct. Beginners often improve quickly when they practice simple scenes and focus on big shapes first.
How do I stop charcoal from smudging?
Use a clean sheet under your drawing hand and spray a fixative when finished. You can also work from top to bottom or left to right to avoid dragging charcoal across the page.
Conclusion
Charcoal landscape drawing is a rich, flexible, and deeply rewarding way to study nature. It teaches you to see light, shape, depth, and mood with more care, and that skill carries into almost every other art form. The best results usually come from simple structure, patient layering, and a willingness to let the medium stay a little wild.
If you are starting out, keep your scene simple, trust the values, and practice often. The more you work with charcoal landscape drawing, the more natural it becomes. Try a small study this week, compare what works, and keep building from there.
If you found this guide helpful, explore more drawing resources, keep practicing your charcoal landscape drawing, and share your progress or questions in the comments.