
Charcoal erasing techniques help you lift highlights, soften shadows, and fix mistakes without ruining the drawing.
If you work with charcoal, erasing is not just about fixing errors. It is part of the drawing process itself. Knowing how to use charcoal erasing techniques can help you shape form, control contrast, and create more life in your artwork. When used well, an eraser becomes just as important as the charcoal stick in your hand.

What charcoal erasing techniques are and why they matter
Charcoal erasing techniques are the methods artists use to remove, lighten, or reshape charcoal on paper. They are useful for corrections, but they also help build texture, value, and light. In my own drawing practice, I have often found that the best highlights are not added with white. They are pulled out of the dark with a clean eraser.
Charcoal is soft, movable, and forgiving. That makes it different from many other drawing media. You can erase a line, soften an edge, or create the illusion of reflected light. That flexibility is one reason charcoal remains a favorite in sketching, portrait work, and figure drawing.
These techniques matter because charcoal drawings are mostly about value. If you can erase well, you can control value more precisely. That control gives your work depth, balance, and a more professional finish.
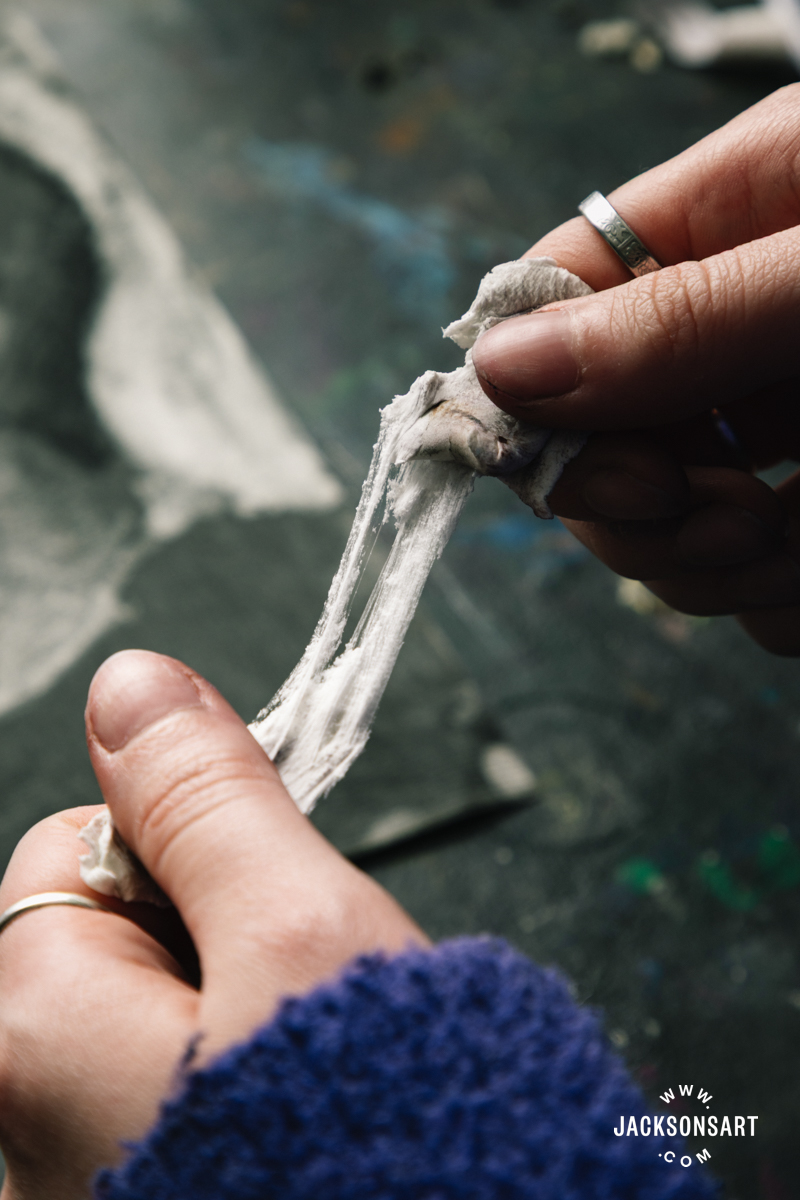
Tools used in charcoal erasing techniques
The tool you choose changes the result a lot. Some erasers remove charcoal cleanly, while others barely touch the paper. Knowing the difference helps you avoid damage and get the effect you want.
Common tools include:
- Kneaded eraser: This soft, moldable eraser lifts charcoal gently and is great for highlights.
- Vinyl or plastic eraser: This removes more charcoal and works well for stronger corrections.
- Precision eraser pencil: This is useful for small areas, thin lines, and detail work.
- Eraser shield: This helps protect nearby marks while you clean a small spot.
- Soft brush or drafting brush: This does not erase charcoal, but it helps remove loose dust before erasing.
From experience, the kneaded eraser is the most forgiving tool for beginners. It feels like working with clay, and that makes it easy to dab instead of rub. That simple habit can save the paper surface.
Main charcoal erasing techniques artists use
There are several charcoal erasing techniques, and each one serves a different purpose. The goal is not just to erase, but to shape the drawing with intention. A good erasing method can make an eye sparkle or bring out the curve of a cheek.
Lifting charcoal with a kneaded eraser
This is one of the gentlest charcoal erasing techniques. You press the eraser into the charcoal and lift it away instead of rubbing.
Use it for:
- Soft highlights in hair
- Light in the eyes
- Faint texture in fabric
- Subtle corrections
I use this method most when I want to keep the paper tone clean. It is also useful when the drawing is already layered and I do not want to disturb the whole surface.
Removing charcoal with a vinyl eraser
This method is stronger and more direct. A vinyl eraser removes more pigment, so it is best for bold corrections or very dark marks.
Use it for:
- Cleaning up unwanted lines
- Sharpening edges
- Resetting a section of the drawing
- Creating bright highlight areas
A mistake I made early on was pressing too hard with a vinyl eraser. That can rough up the paper fast. A light touch works better and keeps the surface usable.
Pulling out highlights with a clean edge
This is one of the most useful charcoal erasing techniques in portrait and still life drawing. You use the edge of a kneaded eraser or precision eraser to lift narrow highlights.
Use it for:
- The bridge of the nose
- Lips
- Glass reflections
- Edges of leaves or petals
Think of it like carving light out of darkness. The result often looks more natural than drawing the highlight directly.
Blotting and dabbing for texture
Sometimes you do not want a hard erase. You want a soft, broken light. Dabbing works well for that.
Use it for:
- Clouds
- Skin texture
- Stone surfaces
- Distance haze
This is one of those charcoal erasing techniques that feels more like painting than erasing. It adds atmosphere and keeps the drawing from looking too stiff.
Erasing with masking or selective protection
You can protect areas before adding more charcoal. Artists often use tape, paper shields, or even another sheet of paper to block a section while erasing nearby areas.
Use it for:
- Tight detail work
- Clean edges
- Layered compositions
- Controlled value studies
This method takes a bit more planning, but it helps a lot in detailed work. I have used it many times when working on facial features where one wrong swipe could flatten the whole expression.
How to use charcoal erasing techniques step by step
Charcoal erasing works best when you treat it as part of the drawing process, not an afterthought. A calm, step by step approach gives cleaner results and fewer accidents.
-
Start with loose charcoal layers
Build your darks gradually. It is easier to erase a light layer than to fight a heavy one. -
Test your eraser first
Try it on a small area or scrap paper. Different papers and charcoal brands respond in different ways. -
Lift, do not scrub
Use gentle pressure. Scrubbing can damage the tooth of the paper and leave shiny patches. -
Check the edge of the eraser
A clean edge gives a cleaner highlight. A dirty eraser can smudge more than it removes. -
Rebuild shadows after erasing
Once the highlight is in place, reinforce nearby darks if needed. This creates stronger contrast and better form.
In practice, charcoal erasing techniques work best when you move back and forth between adding and removing. That back-and-forth rhythm is where the drawing starts to feel alive.

Best paper and charcoal types for erasing
Not all surfaces behave the same. Some papers hold charcoal well and erase cleanly. Others get damaged quickly, especially if you use a heavy hand.
Good choices include:
- Medium tooth drawing paper
- Charcoal paper made for layering
- Mixed media paper with some texture
- Heavyweight sketch paper for practice
Charcoal type also matters:
- Vine charcoal is easier to erase and lighten
- Compressed charcoal is darker and harder to remove
- Charcoal pencils offer more control but can sink deeper into paper
If you want stronger charcoal erasing techniques, start with vine charcoal on a textured paper. It gives you more room to correct and lift highlights without destroying the drawing.
Common mistakes to avoid
Even experienced artists can ruin a drawing with poor erasing habits. The good news is that most mistakes are easy to prevent once you know what to watch for.
Common mistakes include:
- Rubbing too hard and tearing the paper
- Using a dirty eraser and smearing the charcoal
- Erasing before the charcoal has settled
- Working on paper with too little tooth
- Erasing the same spot too many times
One lesson I learned the hard way: if the paper starts to look shiny, stop. That usually means the surface is worn down, and more erasing will not help. At that point, the drawing often needs to be adjusted instead of pushed harder.
How charcoal erasing techniques help with different subjects
These techniques are not just for fixing mistakes. They help you draw more realistically across many subjects.
Portraits
Charcoal erasing techniques are especially useful in portrait work. You can lift highlights in the eyes, nose, lips, and hair. This brings out form and makes the face feel dimensional.
Landscapes
In landscapes, erasing helps create clouds, mist, water reflections, and distant light. A soft lift can suggest atmosphere better than a heavy line ever could.
Still life
For still life drawings, erasing can define the shine on glass, metal, fruit, or ceramic surfaces. That contrast gives objects a more believable weight and texture.
Figure drawing
In figure drawing, erasing helps show muscle curves, light on skin, and the shape of limbs. It is especially helpful when you want soft transitions instead of sharp outlines.
Why charcoal erasing techniques improve drawing quality
Good erasing is not about perfection. It is about control. When you know how to erase with purpose, you can guide the viewer’s eye and make the drawing feel more polished.
Benefits include:
- Better control of highlights
- Cleaner edges and shapes
- More realistic light and shadow
- Easier correction of proportions
- Stronger contrast and depth
Charcoal is often described as forgiving, but that forgiveness only works if you know how to use it. Charcoal erasing techniques let you revise without fear. That freedom often leads to bolder, more confident drawings.
Practical tips from real drawing experience
After years of sketching with charcoal, a few habits have made a big difference for me. They sound simple, but they save time and improve results.
- Keep two erasers nearby, one for broad lifting and one for detail
- Clean your eraser often so it does not smear
- Use light layers first, then erase to refine
- Rotate your eraser to keep a fresh edge
- Step back often to check if the highlight actually helps the drawing
A lot of beginners think erasing means they made a mistake. I see it differently. In charcoal work, erasing is part of modeling light, just like shading is part of building shadow.
Frequently Asked Questions of charcoal erasing techniques
What is the best eraser for charcoal drawings?
A kneaded eraser is usually the best all-purpose choice because it lifts charcoal gently and does not damage the paper as easily. For stronger corrections, a vinyl eraser works better.
Can you completely erase charcoal?
You can remove a lot of charcoal, but not always every trace. The result depends on the paper, the type of charcoal, and how long the mark has been on the surface.
Why does charcoal smudge after erasing?
Charcoal smudges when the eraser is dirty, the pressure is too strong, or the paper is already overloaded with pigment. Cleaning the eraser and using a lighter touch usually helps.
How do you make highlights in charcoal drawings?
You can make highlights by lifting charcoal with a kneaded eraser or precision eraser. This works especially well on hair, eyes, and shiny objects.
Does paper type affect charcoal erasing?
Yes, paper type makes a big difference. Textured paper holds charcoal better and usually allows cleaner erasing, while smoother paper can wear down faster and show marks more easily.
Conclusion
Charcoal erasing techniques are one of the most important parts of drawing with charcoal. They help you correct mistakes, shape highlights, and bring more depth into your work. When used with care, erasing becomes a creative tool instead of just a cleanup step.
If you want better charcoal drawings, practice lifting, dabbing, and selective erasing on purpose. Start small, stay gentle, and pay attention to how your paper responds. Try these methods in your next sketch, and keep exploring what your eraser can really do.