
Graphite eraser techniques help you lift, shape, and clean pencil marks without damaging the paper.
If you have ever fought with smudges, ghost lines, or torn paper, you already know that erasing graphite is more skill than afterthought. I’ve spent years testing graphite eraser techniques on sketch paper, drafting sheets, and rough notebook pages, and the difference between a clean correction and a ruined surface often comes down to touch, tool, and timing. In this guide, I’ll break down the most reliable graphite eraser techniques, when to use them, and the small habits that make your work look sharper and more controlled.

What graphite eraser techniques really mean
Graphite eraser techniques are the methods artists, students, and designers use to remove pencil marks with control. The goal is not just to erase, but to erase cleanly, lightly, and in the right place. That matters because graphite sits on top of paper fibers, and the wrong motion can grind it deeper instead of lifting it out.
At the simplest level, these techniques include:
- Using the right eraser type for the job
- Applying light pressure instead of scrubbing
- Erasing in short, targeted strokes
- Lifting graphite instead of dragging it across the page
- Protecting the paper surface while correcting mistakes
I learned early on that erasing is a bit like cleaning a window. If you wipe too hard, you make streaks. If you use the right cloth and motion, the surface becomes clear again.
Types of erasers and when to use them
Different erasers behave differently, and that is a big part of graphite eraser techniques. Choosing the wrong one can leave smears or damage delicate paper. Choosing the right one gives you control, precision, and less frustration.
Vinyl erasers
Vinyl erasers are firm and strong. They remove graphite well, especially from heavier pencil lines or drafting work. They are good for clean corrections, but they can be rough on thin paper if you press too hard.
Gum erasers
Gum erasers are softer and crumbly. They lift graphite gently and are often used for large areas or lighter corrections. They work well when you want less abrasion, though they may leave residue.
Kneaded erasers
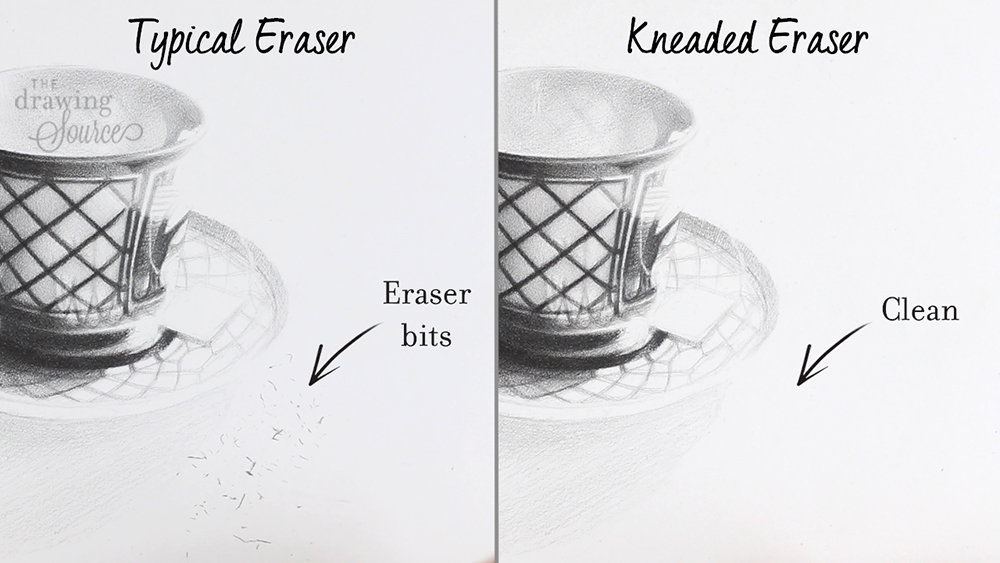
Kneaded erasers are one of the most useful tools in graphite eraser techniques. You can mold them into points, edges, or flat shapes, which makes them ideal for highlights, soft lifting, and detailed cleanup. They do not always remove dark marks fully, but they are excellent for controlled lightening.
Electric erasers
Electric erasers are useful for precise work and repeated corrections. They spin a small erasing tip quickly, which helps remove graphite fast with little hand pressure. I use these when I need a crisp edge or when cleaning up technical drawings.
Pencil-style erasers
These are small and pointed, so they are great for tight spaces. They are especially helpful when you need to erase tiny details without disturbing nearby work. They are not the best for large areas, but they shine in detail work.
Core graphite eraser techniques that work
Good graphite eraser techniques are built on control, not force. The best results usually come from patient, small actions instead of aggressive rubbing. That simple shift can save both your drawing and your patience.
Dab, don’t scrub
One of the biggest mistakes I see is over-rubbing. Scrubbing pushes graphite into the fibers and can make the area look dirty even after erasing. Instead, use a dabbing motion or short soft strokes to lift the graphite step by step.
Work from the outside in
When erasing a mistake, start around the edges and move inward. This keeps the erased area clean and helps you avoid spreading graphite into surrounding lines. It is a small habit, but it makes a big difference in neatness.
Use a clean eraser surface
A dirty eraser can smear graphite back onto the paper. Kneaded erasers should be folded and stretched often so they keep lifting cleanly. Vinyl and gum erasers should also be brushed off or cleaned when they collect too much residue.
Erase in layers
Dark marks often need more than one pass. Use light pressure first, then repeat if needed. This layered approach is safer than trying to erase everything in one go, especially on softer paper.
Use the eraser as a drawing tool
This is one of my favorite graphite eraser techniques. Instead of thinking of the eraser as a correction tool only, use it to create highlights, texture, and form. In portrait drawing, for example, I often shape a kneaded eraser into a fine edge to pull out hair shine or catch light on a cheekbone.
How to erase graphite without damaging paper
Paper damage usually comes from pressure, friction, or the wrong tool. Once the paper fibers are disturbed, the surface can become shiny, fuzzy, or even torn. That is why gentle technique matters as much as the eraser itself.
Here are a few ways to protect the paper:
- Use a soft touch, especially on sketch paper
- Test the eraser on a corner first if the paper is delicate
- Avoid repeated hard rubbing in one spot
- Let the eraser do the work instead of forcing it
- Use a backing sheet under thin paper when needed
In my experience, cheap notebook paper is the easiest to damage. Smooth drawing paper and heavier sketch paper handle graphite eraser techniques much better, especially if you use kneaded or vinyl erasers with care.
Best graphite eraser techniques for artists
Artists often need more than simple correction. They need shaping, shading, and soft lifting. That is where graphite eraser techniques become part of the drawing process itself.
Creating highlights
A kneaded eraser can pull graphite from a shaded area to make highlights. This works especially well for eyes, metal, glass, and hair. I often use a pointed edge and gently tap the area until the highlight appears.
Softening shadows
Sometimes a drawing looks too dark or too sharp. Light erasing can soften the tone and make shadows blend better. This is useful when you want a smoother transition between light and dark areas.
Cleaning edges
Sharp edges matter in technical drawings and clean line art. A pencil-style eraser or electric eraser can help you erase just outside a line to sharpen the form. I use this trick when I want a cleaner silhouette without redrawing everything.
Building texture
You can use erasing to suggest texture, not just remove marks. For example, short lifted marks can create the look of fur, fabric shine, or rough stone. It is one of those graphite eraser techniques that feels more like sculpting than erasing.
Graphite eraser techniques for school, drafting, and note cleanup
Not every erasing job is artistic. Sometimes you just want a tidy notebook page or a corrected draft. The same techniques still help, but the goal is usually speed and cleanliness.
For school notes:
- Use a small vinyl or pencil-style eraser for mistakes
- Erase early before the graphite settles deep into the page
- Avoid overworking thin paper
- Keep a separate eraser for clean pages and another for messy use
For drafting and design:
- Use precision erasers for line corrections
- Pair erasing with rulers or shields when needed
- Keep the paper flat so the eraser does not catch a fold
- Use light, repeated passes for technical accuracy
For everyday cleanup:
- Choose a soft eraser for light marks
- Brush away crumbs instead of wiping them
- Do not press hard if the goal is just to remove a stray line
Common mistakes to avoid
Even simple graphite eraser techniques can go wrong if you rush. I have made most of these mistakes myself, usually while trying to “fix” something too fast. The good news is that once you know them, they are easy to avoid.
Common mistakes include:
- Pressing too hard and tearing the paper
- Using a dirty eraser and smearing graphite
- Scrubbing back and forth instead of lifting gently
- Picking the wrong eraser for the paper type
- Erasing too late after the graphite has settled deeply
- Over-erasing, which can leave shiny patches
A shiny patch is often a sign that the paper surface has been worn down. Once that happens, graphite may not lay down evenly there again. That is why a light hand is usually better than a powerful one.
How pencil grade affects erasing
Pencil grade changes everything. Softer pencils like 4B or 6B lay down darker, thicker graphite, which can be harder to erase fully. Harder pencils like H or 2H make lighter lines that usually erase more cleanly.
Here is the simple rule:
- Softer pencils are darker but harder to erase
- Harder pencils are lighter and easier to remove
- Medium grades like HB or 2B are often the easiest balance for everyday use
This is one reason draftspeople often test a pencil grade before starting a full project. If you know you may need to erase later, a slightly harder pencil can save you a lot of cleanup.
Practical step-by-step graphite eraser method
If you want a simple routine, this one works well for most pages.
- Choose the right eraser for the paper and pencil grade.
- Brush away loose graphite dust first.
- Start with very light pressure.
- Erase from the outer edge of the mark inward.
- Check the result before repeating.
- Fold or clean the eraser if it starts to smear.
- Stop as soon as the page looks clean enough.
I use this process almost every time I sketch. It is calm, repeatable, and it keeps me from overcorrecting.
Why clean erasing matters
Clean erasing is not just about appearance. It also improves readability, reduces visual clutter, and helps final work look more professional. In artwork, good erasing can preserve paper quality and support better layering. In notes or technical work, it makes the page easier to review and understand.
There is also a confidence factor. When you know your graphite eraser techniques are solid, you sketch and plan more freely. You stop fearing mistakes because you know how to recover from them.
Frequently Asked Questions of graphite eraser techniques
What is the best eraser for graphite?
The best eraser depends on the job. Kneaded erasers are great for light lifting and highlights, while vinyl erasers are better for stronger removal.
Why does graphite smear when I erase it?
Graphite smears when too much pressure pushes it across the paper instead of lifting it. A dirty eraser or rough paper can make the problem worse.
Can I erase dark pencil marks completely?
Sometimes, but not always. Very soft pencils like 6B can leave a faint ghost mark, especially on absorbent paper.
Are kneaded erasers better than regular erasers?
They are better for controlled lifting and detail work, but not always for full removal. Many people keep both because each has a different job.
How do I stop damaging paper when erasing?
Use light pressure, clean tools, and the right eraser for the paper type. If the paper is thin, test in a small corner before working on the main area.
Conclusion
Graphite eraser techniques are simple on the surface, but they make a huge difference in the final result. When you match the eraser to the paper, use light pressure, and erase with intention, your pages stay cleaner and your drawings look more polished. The real trick is to treat erasing like part of the craft, not just a cleanup step.
If you want better results, start with one habit today: use less pressure and more control. Try a few of these graphite eraser techniques on your next sketch or notes page, and notice how much smoother your corrections become. If this guide helped, keep exploring related drawing and drafting tips, or leave a comment with your favorite erasing method.