
Mechanical pencil drawing gives you crisp lines, clean detail, and easy control for precise artwork.
Mechanical pencil drawing is one of the most practical and rewarding ways to sketch, shade, and refine art with accuracy. Whether you are a beginner learning line control or an experienced artist building smooth graphite layers, this method offers speed, consistency, and comfort that traditional wood pencils sometimes cannot match. In this guide, I’ll walk you through the tools, techniques, strengths, limits, and real-world tips that matter most, so you can improve your mechanical pencil drawing with more confidence and fewer mistakes.
What Mechanical Pencil Drawing Is and Why It Matters
Mechanical pencil drawing is the practice of creating art with a refillable pencil that uses thin graphite leads instead of being sharpened. That simple design changes the whole drawing experience. The line stays more consistent, the tip stays sharp longer, and the pencil often feels more precise in the hand.
I still remember the first time I switched from a standard wooden pencil to a 0.5 mm mechanical pencil for sketching faces. The biggest surprise was not the cleaner line. It was how much easier it became to keep features aligned, especially around eyes, lips, and hair edges. Mechanical pencil drawing rewards small, careful motions, which is why many artists use it for technical sketching, portraits, comics, and design work.
For many artists, mechanical pencil drawing is also about control. You can focus on form and value instead of stopping to sharpen every few minutes. That may sound minor, but in a long drawing session, it makes a real difference.

The Best Mechanical Pencil Sizes for Drawing
Choosing the right lead size is one of the first decisions that shapes your results. Different sizes affect line width, durability, and how much pressure you can use. For mechanical pencil drawing, the most common lead sizes are 0.3 mm, 0.5 mm, 0.7 mm, and 0.9 mm.
Here is how they usually perform:
- 0.3 mm: Very fine and precise, but fragile. Best for tiny details and technical work.
- 0.5 mm: A balanced choice for general mechanical pencil drawing. Good for outlines, sketching, and light shading.
- 0.7 mm: Stronger and smoother. Great for drawing with a little more pressure.
- 0.9 mm: Best for bold sketch lines, loose studies, and shading with less break risk.
From my own experience, 0.5 mm is the safest all-around choice for most people. If you press hard, use 0.7 mm or 0.9 mm to avoid constant lead breaks. If you draw very small details, 0.3 mm can be great, but it demands a lighter touch.
The lead grade matters too. HB is a common middle ground. B and 2B are softer and darker, while H grades are harder and lighter. For mechanical pencil drawing, many artists keep a few grades on hand so they can switch between clean line work and richer shading.
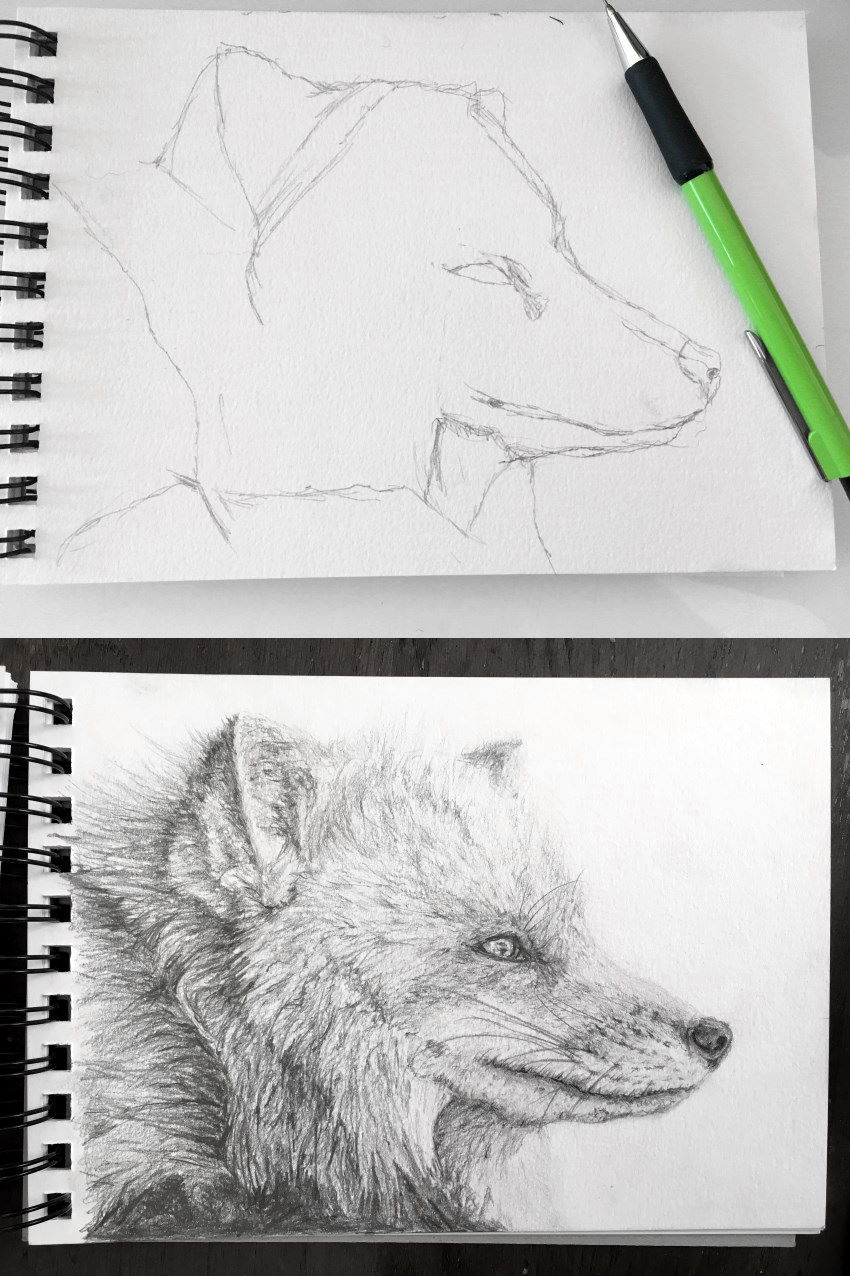
Essential Tools for Mechanical Pencil Drawing
A good drawing result depends on more than just the pencil itself. The lead, paper, eraser, and grip all play a role. If one part feels off, the whole process can become frustrating.
Useful tools for mechanical pencil drawing include:
- Mechanical pencils in more than one size
- Lead refills in HB, B, and 2B
- A kneaded eraser for soft lifting and highlights
- A vinyl or plastic eraser for clean corrections
- Smooth drawing paper or sketch paper with light texture
- A pencil grip for comfort during long sessions
- A ruler or circle template for technical work
Paper choice is often ignored, but it matters a lot. Very rough paper can wear down fine lead quickly. Very smooth paper can make shading harder if it does not hold graphite well. In my own sketchbooks, I usually prefer a slightly smooth paper for line work and a bit more tooth when I want softer shading.
If you are serious about mechanical pencil drawing, do not think only in terms of “the best pencil.” Think in terms of a system. The tool, the paper, and your hand pressure all work together.

Basic Mechanical Pencil Drawing Techniques
Mechanical pencil drawing looks simple at first, but better results come from technique, not force. Light pressure and careful layering usually work better than trying to make a dark line in one pass. That approach helps you avoid dents in the paper and gives you more control over values.
Try these core techniques:
- Use light construction lines first
- Build shadows in layers instead of pressing hard
- Hold the pencil farther back for loose sketching
- Hold it closer to the tip for detail work
- Rotate the pencil slightly as you draw to keep the lead edge fresh
- Use short strokes for texture and long strokes for smooth edges
One mistake I made early on was treating a mechanical pencil like a pen. I pressed too hard and ended up with shiny, scratched paper and broken lead. The pencil works best when you let the lead glide. Think of it like walking on ice carefully instead of stomping on concrete.
Mechanical pencil drawing also benefits from rhythm. If you rush, the line can look stiff. If you move too slowly, the sketch can feel overworked. A steady pace usually gives the cleanest result.

Shading in Mechanical Pencil Drawing
Shading is where mechanical pencil drawing really comes alive. Good shading creates depth, form, and mood. It can make a flat sketch look solid and believable.
There are several useful shading methods:
- Hatching: Parallel lines that build tone
- Cross-hatching: Layers of intersecting lines for darker areas
- Contour shading: Lines that follow the shape of the object
- Smooth layering: Repeated light passes for soft gradients
- Stippling: Tiny dots for texture and value
For smooth shading, use soft lead like B or 2B and keep your hand pressure low. If you want cleaner gradients, work slowly and overlap each layer a little. Mechanical pencil drawing is especially good for controlled shading because the point stays narrow and predictable.
A common issue is creating banding, where shading looks striped instead of smooth. This usually happens when strokes are too far apart or pressure changes too much. I’ve found that shorter, more even strokes solve this fast. Think of shading like polishing a surface, not coloring a wall in one heavy pass.

How to Improve Line Quality
Line quality separates average sketches from polished mechanical pencil drawing. A clean line can make an object feel deliberate, while a shaky line can make it look uncertain. The goal is not perfection. The goal is confidence.
To improve your lines:
- Draw from the shoulder for long curves
- Use the wrist for small details
- Practice slow, steady strokes
- Avoid scribbling over the same line too much
- Keep the lead sharp but not needle thin
- Match line weight to the subject
One lesson I learned after years of sketching is that line weight tells a story. A slightly darker edge can bring focus to the subject, while a lighter line can push parts back. In mechanical pencil drawing, this subtle shift matters more than many beginners think.
If your lines wobble, do not panic. Warm up with circles, ellipses, and straight lines before drawing. That five-minute habit can dramatically improve control.
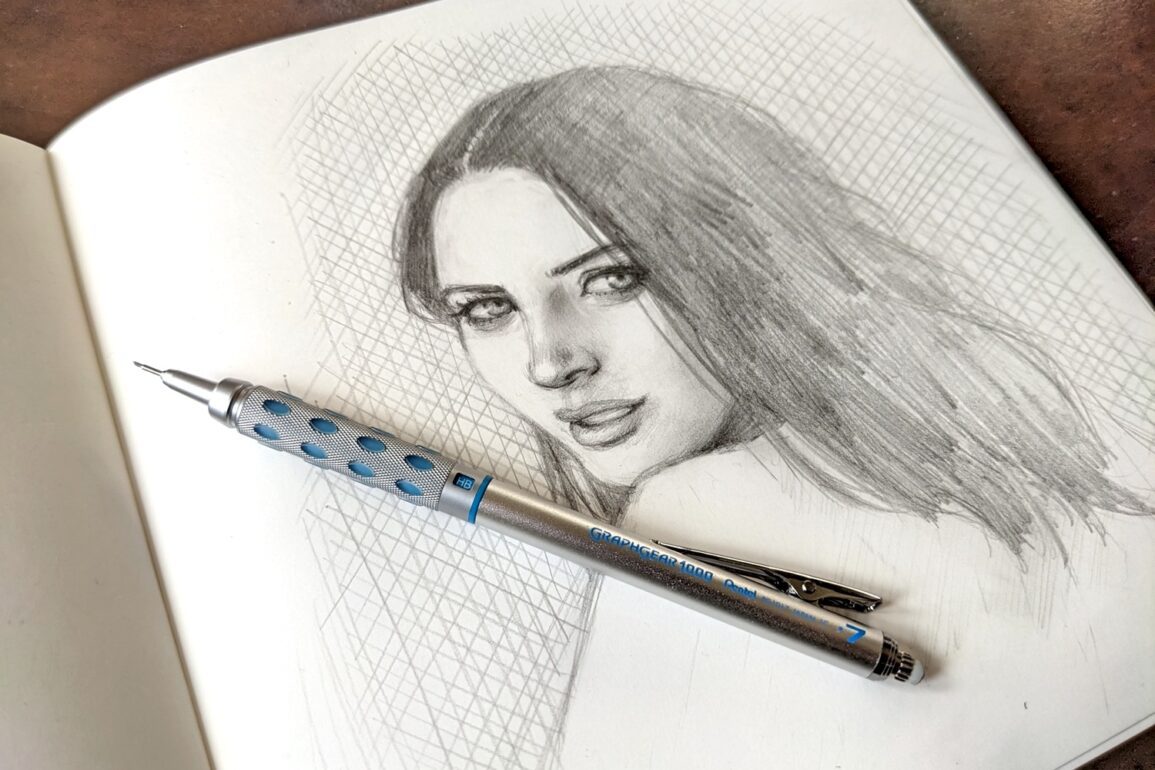
Common Mistakes to Avoid
Even strong artists run into the same problems when they start mechanical pencil drawing. The good news is that most of them are easy to fix once you notice them.
Common mistakes include:
- Pressing too hard and damaging the paper
- Using only one lead grade for every task
- Skipping warm-ups before drawing
- Choosing the wrong paper texture
- Overblending and losing crisp detail
- Ignoring hand position and grip comfort
- Rushing the sketch before planning proportions
The biggest mistake I see is overworking the drawing. Mechanical pencil drawing can tempt you to keep refining forever because the lines are so precise. But too much refinement can make the art look stiff. Sometimes the best move is to stop, step back, and trust the structure you already built.
Another problem is lead breakage. If this happens often, the issue may be too much pressure, a thin lead size, or a pencil that does not support the lead well. Try easing up first before blaming the tool.

Mechanical Pencil Drawing for Beginners
If you are new to mechanical pencil drawing, start simple. You do not need a huge set of supplies. A reliable 0.5 mm pencil, HB lead, a good eraser, and plain sketch paper are enough to begin.
A beginner-friendly practice routine:
- Draw straight lines and circles for five minutes.
- Sketch simple objects like mugs, apples, or boxes.
- Practice light shading with one light source.
- Copy basic forms to study proportion.
- Move into portraits, hands, or buildings once your control improves.
When I teach beginners, I often tell them to focus on shape first, detail second. Mechanical pencil drawing can make people chase tiny details too early. That usually leads to confusion. Get the big forms right, then refine the smaller parts.
You will improve faster if you draw often, even for short sessions. Ten focused minutes a day is better than one exhausting three-hour session once a month.
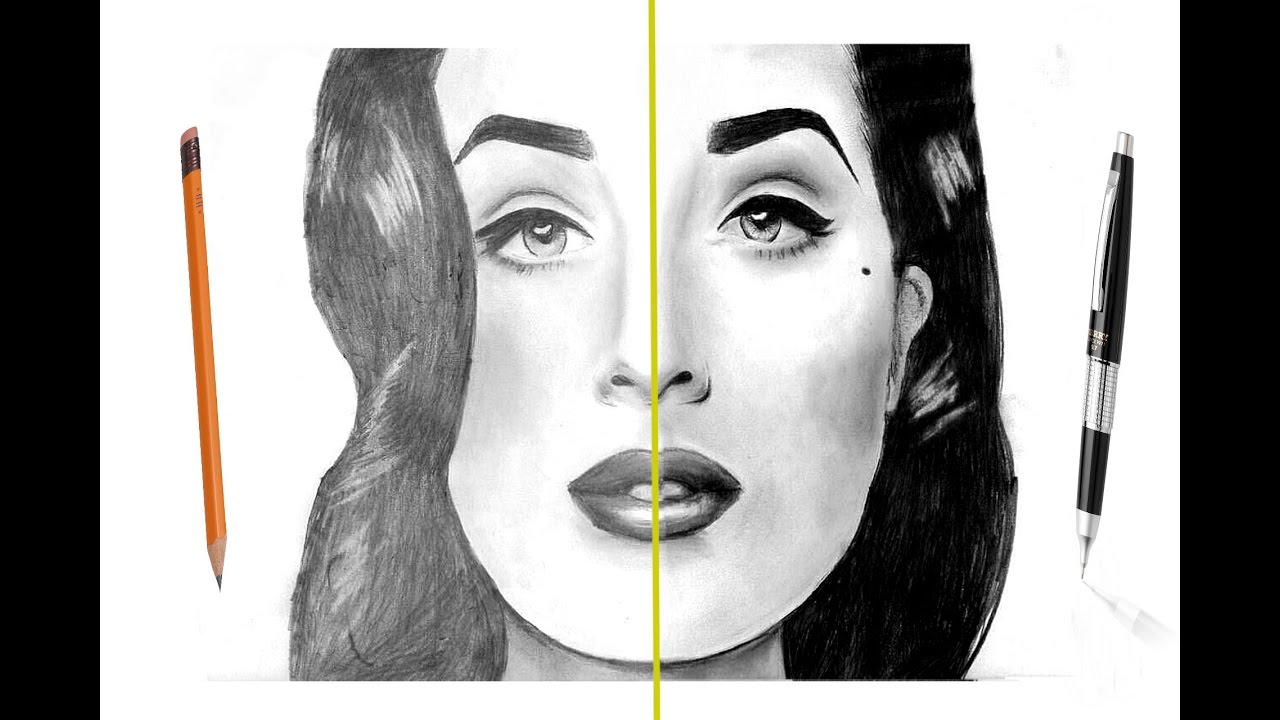
Advanced Uses of Mechanical Pencil Drawing
Once you are comfortable, mechanical pencil drawing can support much more than basic sketching. Many artists use it for illustration, product design, architectural drawings, character art, and even hyperrealistic portraits.
Advanced uses include:
- Portrait drawing with fine facial detail
- Technical sketches with measured lines
- Fashion sketches with clean contour work
- Comic and manga art
- Product concept drawing
- Hyperrealistic texture studies
In detailed portrait work, mechanical pencils shine because they hold tight edges well. That makes them useful for eyelashes, hair strands, fabric folds, and reflective surfaces. For technical drawing, the consistent line width helps keep measurements clear and readable.
Still, it helps to know the limit. Mechanical pencil drawing is excellent for precision, but some artists prefer wood pencils or graphite sticks for broad, expressive shading. A smart artist picks the tool that fits the goal.

Benefits and Limitations of Mechanical Pencil Drawing
Mechanical pencil drawing has many strengths, but it is not perfect for every style. Knowing both sides helps you choose the right approach.
Benefits:
- No sharpening needed
- Consistent line width
- Excellent detail control
- Easy to carry and use
- Good for sketching and technical work
- Less waste than wooden pencils
Limitations:
- Lead can break under heavy pressure
- Fine lead sizes may feel fragile
- Broad shading can take longer
- Some pencils feel less natural for expressive work
- Cheap pencils may wobble or jam
In my own work, the biggest benefit has always been consistency. I know what to expect from a mechanical pencil. The biggest drawback is that it can feel too precise if I want loose, painterly marks. That is why I keep mechanical pencils in my kit, but I do not rely on them for everything.
Practical Tips to Get Better Results
Small habits can make your mechanical pencil drawing much stronger. These are the kinds of details that save time and improve quality.
Try these practical tips:
- Keep your lead a little longer for smoother lines
- Store extra lead so you do not run out mid-sketch
- Test pressure before starting the final drawing
- Use a scrap sheet under your hand to avoid smudging
- Clean your eraser often for sharper corrections
- Rotate between lead grades based on the task
One of the best habits I picked up was using very light construction lines first. That gives me room to fix mistakes without leaving marks that fight the final drawing. In mechanical pencil drawing, early restraint usually leads to a cleaner finish.
Also, do not ignore ergonomics. If your hand hurts after 20 minutes, the grip may be too tight or the pencil body too thin. Comfort matters more than people think, especially for long sessions.
Frequently Asked Questions
What is the best mechanical pencil size for drawing?
For most people, 0.5 mm is the best all-around size for mechanical pencil drawing. It balances precision and durability, which makes it useful for sketching, outlining, and light shading.
Can you shade with a mechanical pencil?
Yes, you can shade very well with a mechanical pencil. Softer leads like B or 2B work best for darker tones and smooth layering.
Is mechanical pencil drawing good for beginners?
Yes, it is a great choice for beginners because it gives clean, controlled lines and does not need sharpening. It also helps new artists practice light pressure and better line control.
What paper works best for mechanical pencil drawing?
A smooth or lightly textured drawing paper usually works best. Very rough paper can wear down fine lead too fast, while very slick paper may not hold graphite well.
How do I stop my mechanical pencil lead from breaking?
Use lighter pressure, choose a thicker lead like 0.7 mm, and avoid extending the lead too far. A good-quality pencil also helps because it supports the lead more securely.
Conclusion
Mechanical pencil drawing is a simple tool with a lot of depth behind it. It can help you sketch faster, draw cleaner lines, and build detail with more control. Once you understand lead size, pressure, shading, and paper choice, the process becomes much smoother and more enjoyable.
If you want better results, start with small habits: lighter strokes, better paper, and steady practice. The more you use mechanical pencil drawing, the more you will notice how much it rewards patience and precision. Try the tips in this guide, keep experimenting, and continue building your own style.