
The best colored pencil layering order usually starts with light colors, then midtones, then darks.
Getting the colored pencil layering order right can make a flat drawing look rich, smooth, and alive. I’ve spent years testing different colored pencil layering order methods on portraits, landscapes, and still lifes, and the same rule keeps proving true: the order you build color matters as much as the color itself. If you want cleaner blends, stronger shadows, and fewer muddy spots, this guide will walk you through the layering order that actually works.
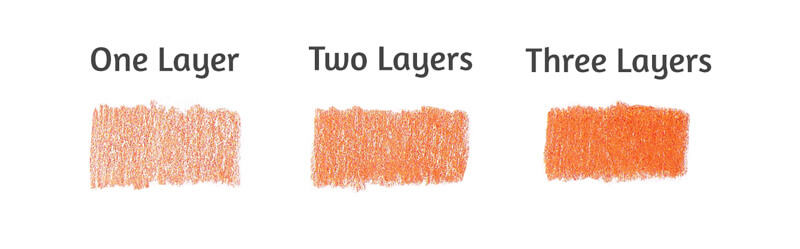
What colored pencil layering order means
Colored pencil layering order is the sequence you use to place colors on paper. It affects how well the colors blend, how deep the shadows look, and how bright the highlights stay.
Think of it like building a sandwich. If you stack the wrong ingredients first, the whole thing gets messy. With colored pencil layering order, you want each layer to support the next one instead of fighting it.
In most cases, the safest approach is:
- Light colors first
- Midtones next
- Dark colors last
- Burnishing or final blending at the end
That order helps preserve brightness and gives you more control. It also keeps the paper tooth open longer, which matters a lot when you work with wax-based or oil-based pencils.
Why layering order matters so much
The layering order shapes the final look of your drawing. If you put dark colors down too early, they can overpower the lighter layers and make the piece look dull.
I learned this the hard way while working on a horse portrait. I laid in a deep brown shadow before building the coat color, and the fur lost its warmth fast. After that, I started using a more careful colored pencil layering order, and the results improved right away.
Here’s why the order matters:
- It controls brightness
- It helps avoid muddy color mixes
- It makes blending smoother
- It lets you correct mistakes more easily
- It improves depth and form
Artists and art educators often teach layering from light to dark for a reason. That method matches how the eye reads color and how pencil pigment settles into paper. It is one of the most dependable colored pencil layering order strategies for beginners and advanced artists alike.
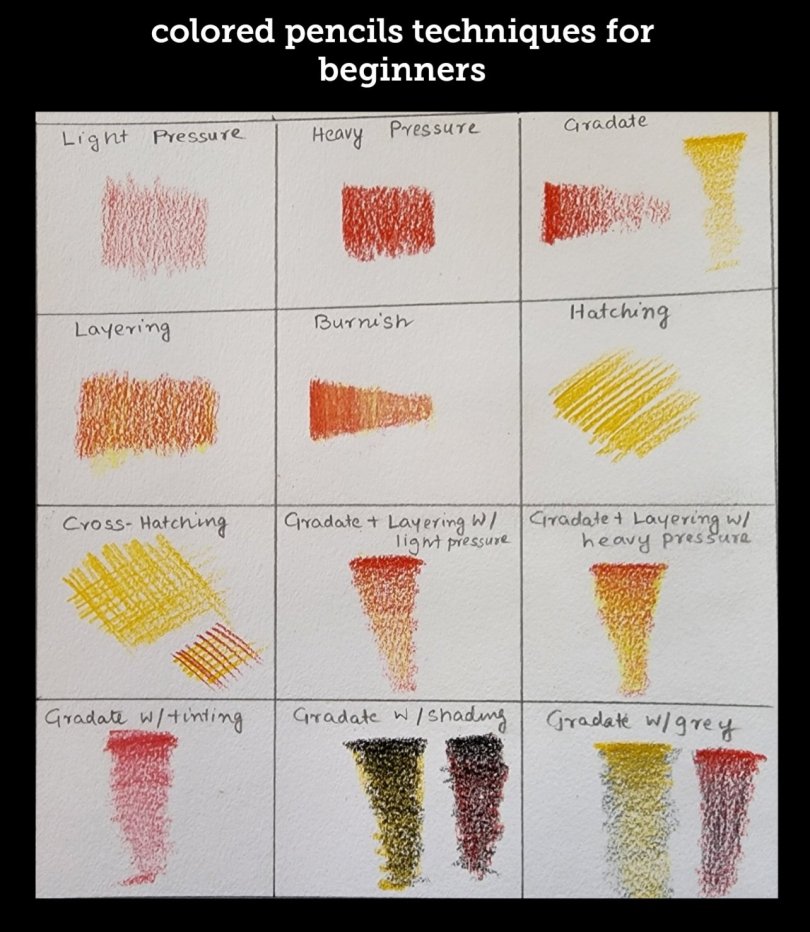
The basic colored pencil layering order that works best
There is no single rule for every artwork, but this is the most reliable colored pencil layering order for most projects.
-
Start with light pressure and light colors
Use pale versions of the main colors first. This protects the paper and gives you room to adjust. -
Add midtones
Build the body of the color with the middle values. This is where most of the form starts to appear. -
Deepen shadows
Add darker colors slowly. Do not jump straight to black unless the subject truly needs it. -
Refine edges and details
Place sharper, more focused marks only after the base layers are stable. -
Burnish or finish if needed
Use a colorless blender or a heavy final layer when you want a polished look.
This colored pencil layering order gives you the most flexibility. It is also easier to fix than starting with darks and trying to lift them later.
How to choose the right colors in your layering order
The best colored pencil layering order depends on the subject and the color family. A skin tone needs a different order than grass, metal, or a sunset.
Here are a few practical examples:
- Skin tones: peach or light beige, then pinks, browns, and deeper shadows
- Green foliage: yellow-green, then mid-green, then olive, forest green, and dark accents
- Blue skies: pale blue first, then medium blue, then deeper blue near the horizon or clouds
- Fur or hair: base color, warm or cool midtone, then dark strands and highlights last
A good rule from my own practice is to ask, “What color is this really closest to in the light?” Start there. Then use the colored pencil layering order to slowly move toward the darker or richer tones.
Common mistakes in colored pencil layering order
Most layering problems are not about talent. They are about sequence and pressure.
Here are the mistakes I see most often:
-
Starting too dark
This can flatten the drawing and make later layers harder to apply. -
Pressing too hard too soon
Heavy pressure closes the paper tooth early, which stops later layers from sticking well. -
Using black too early
Black can kill color if it is added before the other layers are built. -
Ignoring undertones
A subject often has warm or cool base colors that need to go in first. -
Layering random colors without a plan
This often leads to muddy results instead of clean depth.
I used to think more pressure meant better color. It usually did the opposite. Once I slowed down and treated the colored pencil layering order like a step-by-step process, my work became cleaner and much easier to control.
Best layering order by subject
Different subjects need slightly different approaches. The core idea stays the same, but the color sequence changes.
Skin tones
Skin looks most natural when you layer softly and build slowly.
- Begin with a light base such as peach, cream, or pale yellow
- Add warm pinks, light browns, and muted reds
- Use cool tones sparingly in shadows
- Finish with deeper browns or muted grays for form
Skin is one place where the wrong colored pencil layering order can make the subject look chalky or orange. Keep the layers thin and let the paper do some of the work.
Landscapes
Landscapes often need temperature shifts more than exact color matches.
- Lay in sky and distant areas with soft light blues and grays
- Build greens, earth tones, and mid-values in the middle ground
- Add dark tree trunks, rocks, and shadow areas last
- Save bright accents like flowers or reflected light for the end
I like to think of landscapes as a stage. The background sets the mood, the middle ground tells the story, and the dark details bring the drama.
Animals and fur
Fur looks best when your layering order follows the direction of hair growth.
- Start with the lightest fur color
- Add warm or cool midtones
- Layer in darker strands and shadow shapes
- Keep some paper texture visible for realism
If you layer dark fur first, you often lose the soft movement that makes animal art feel alive. A smart colored pencil layering order keeps the fur airy and natural.
Still life objects
Still life subjects often have smoother surfaces and clearer shadows.
- Begin with the local color
- Add reflected color and soft shadows
- Strengthen cast shadows with deeper tones
- Finish with highlights and crisp edges
For shiny objects, be careful not to overblend too soon. You need some contrast left at the end.
Light to dark vs. dark to light
For most artists, light to dark is the better colored pencil layering order. It gives you more control and keeps highlights cleaner.
That said, dark to light can work in some special cases, like:
- Strong graphic art
- Stylized illustrations
- Very dark backgrounds
- Quick sketching where bold shapes matter more than realism
Even then, I usually still recommend keeping the first layers soft. The biggest mistake is thinking dark first means faster. Often, it means more repair work later.
How paper and pencil type affect layering order
The colored pencil layering order changes a bit depending on your tools. Paper texture and pencil formula matter a lot.
Here’s what to keep in mind:
- Toothier paper holds more layers
- Smooth paper fills up faster
- Wax-based pencils can feel creamy and blend well
- Oil-based pencils often keep a sharper point longer
- Softer pencils may need gentler pressure
- Harder pencils may be better for early layers and detail
If you use smooth paper, your colored pencil layering order should be more careful and lighter. If you use textured paper, you can build more layers before the surface starts to close.
Practical layering tips that improve results fast
These are the habits that made the biggest difference in my own colored pencil work.
- Use a light touch in the first layers
- Keep your pencil sharp for detail
- Work in small zones instead of the whole page at once
- Test color combinations on scrap paper first
- Step back often to check the overall balance
- Leave highlights uncolored until the end
The best colored pencil layering order is never rushed. It is more like gardening than painting a wall. You plant one layer, wait, adjust, and keep building.
A simple step-by-step workflow you can follow
If you want a reliable colored pencil layering order for almost any drawing, try this.
-
Lightly sketch your subject
Keep the drawing clean and simple. -
Lay down the lightest local colors
Use minimal pressure. -
Add midtone color families
Focus on form and shape. -
Develop shadows
Use dark browns, dark blues, deep greens, or other rich darks instead of jumping straight to black. -
Blend with more layers
Let the colors mix through layering, not force. -
Refine texture and edges
Add hair, fabric folds, veins, wrinkles, or small marks. -
Save highlights for the end
Use the paper color or a very light pencil for bright spots.
This process keeps the colored pencil layering order organized and repeatable. Once you practice it a few times, it starts to feel natural.
Benefits of mastering colored pencil layering order
Learning the right layering sequence pays off quickly.
- Better color depth
- Cleaner blends
- Stronger realism
- Fewer muddy areas
- More control over highlights and shadows
- Less wasted paper and fewer do-overs
It also makes drawing less stressful. You stop guessing and start building with purpose.
Limitations of colored pencil layering order
Even the best colored pencil layering order has limits.
- Too many layers can fill the paper tooth
- Some paper surfaces do not support heavy layering
- Dark colors can still overpower light ones if you push too hard
- Some pigments are naturally stronger than others
- Not every brand blends the same way
This is why testing matters. There is no perfect formula for every pencil brand, paper type, or subject. The best results come from learning how your own tools behave.
Frequently Asked Questions about colored pencil layering order
What is the best colored pencil layering order for beginners?
The best starting order is light colors, then midtones, then darks. This gives beginners more room to fix mistakes and prevents the drawing from getting too muddy too soon.
Should I layer dark colors first in colored pencil drawing?
Usually, no. Dark colors are best added later because they can flatten the drawing and make it harder to keep highlights bright.
How many layers can colored pencils handle?
It depends on the paper, pencil brand, and pressure you use. Smooth paper may hold fewer layers, while textured paper can take many more before the surface fills up.
Can I blend colored pencils without ruining the layering order?
Yes. The safest way is to blend by adding more light pressure layers instead of forcing the colors together. That keeps your colored pencil layering order intact and gives you smoother transitions.
Why do my colored pencil layers look muddy?
Muddy color usually happens when you layer too many unrelated colors or start with darks too early. Sticking to a planned colored pencil layering order helps keep the colors cleaner and more natural.
Conclusion
The right colored pencil layering order can change everything about your artwork. When you build from light to dark, use gentle pressure, and choose colors with purpose, your drawings gain depth, clarity, and life.
If you want better results, start simple and stay patient. Try this layering order on your next sketch, compare the results, and notice how much easier blending becomes. Keep practicing, test your own color combinations, and share what you learn with other artists or in the comments.