
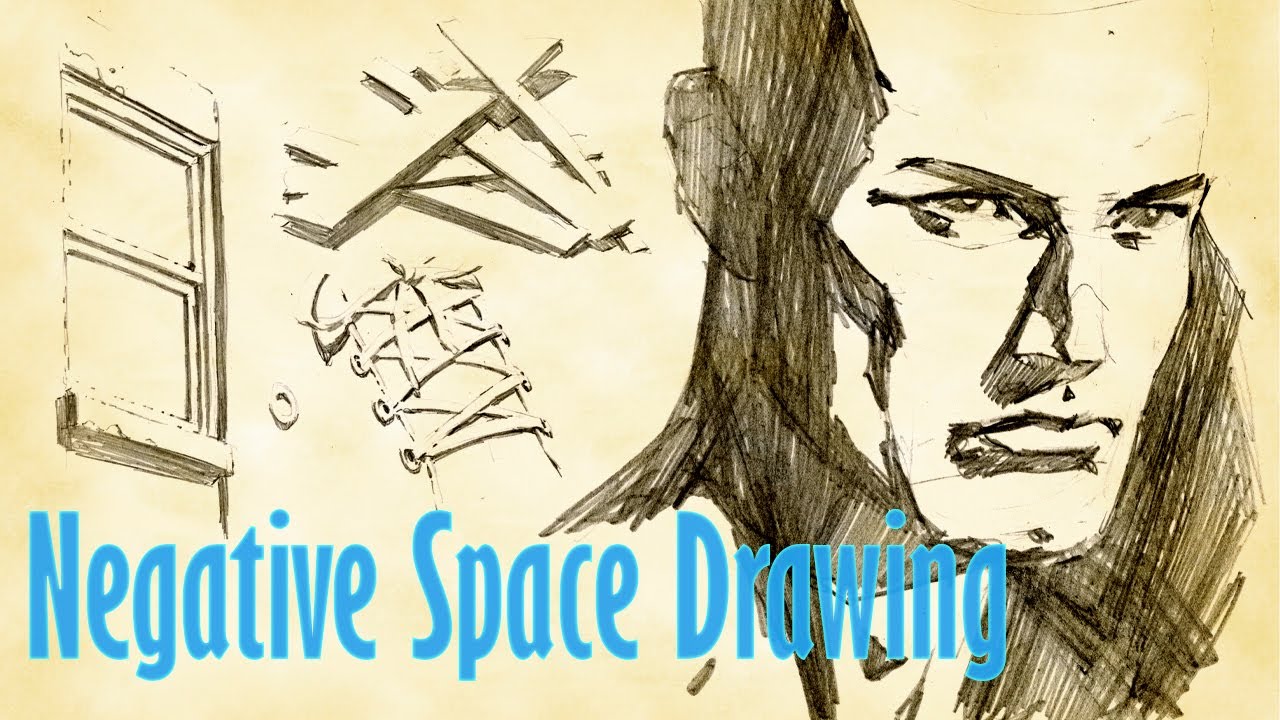
Negative space drawing is the art of drawing the space around and between objects instead of the objects themselves.
Negative space drawing looks simple at first, but it changes how you see everything on the page. Once you learn it, you start noticing shapes, balance, and edges in a way that can improve your drawing fast. In this guide, I’ll break down negative space drawing in a clear, practical way, with tips, examples, and lessons I’ve learned from using it in real sketching sessions.

What Is Negative Space Drawing?
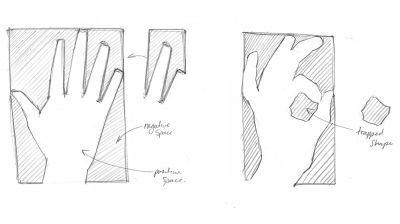
Negative space drawing means focusing on the empty areas around a subject rather than the subject itself. In art, the subject is often called the positive space, while the surrounding empty area is the negative space.
This approach helps you see shapes more accurately. Instead of drawing a chair, for example, you draw the shapes made by the space around the legs, seat, and back. That shift sounds small, but it often leads to cleaner proportions and stronger composition.
I’ve found this method especially useful when a subject feels too complex. If I try to “draw the thing” too soon, I start guessing. But when I draw the empty shapes first, the whole image usually falls into place more naturally.
Why Negative Space Drawing Works
Negative space drawing works because the brain is good at recognizing objects, but it can also rush and fill in what it thinks it sees. That is where mistakes happen. By focusing on space instead of the object, you slow down and observe what is actually there.
This method is also backed by how visual perception works. Artists and educators often use it to train observation, improve accuracy, and reduce symbolic drawing habits, like drawing a generic hand or tree from memory. The goal is to see edges, angles, and proportions without letting labels get in the way.
In practice, it can help with:
- Better proportion
- Cleaner outlines
- Stronger composition
- Improved hand eye coordination
- Less overthinking while sketching
How to Identify Negative Space
The easiest way to start is to stop thinking about the object as an object. Instead, look at the open areas around it and ask what shapes those spaces make.
A simple way to practice is to use your eyes like a camera. Notice the gaps between branches, the space under a bicycle seat, or the shape between a model’s arm and torso. Those spaces may look strange at first, but that is a good sign. Strange shapes often mean you are truly observing.
Try this process:
- Choose a simple subject, like a chair, plant, or mug.
- Squint a little to reduce detail.
- Look only at the empty spaces around and inside the object.
- Sketch those shapes first.
- Add the object later if needed.
One mistake I made early on was drawing too much detail too soon. I’d outline the object first, then try to fit the spaces around it afterward. That usually made everything feel stiff. When I reversed the process, the drawing became more natural and less forced.
Benefits of Negative Space Drawing
Negative space drawing is popular because it teaches more than one skill at a time. You are not just making a sketch. You are training your eye, your hand, and your sense of design.
Here are some of the biggest benefits:
- It improves observation skills by making you slow down and look closely.
- It helps with accuracy because you measure shapes, not assumptions.
- It strengthens composition by teaching balance between filled and empty areas.
- It reduces the urge to copy symbols from memory.
- It builds confidence for beginners who feel intimidated by complex subjects.
For me, the biggest benefit has been confidence. I used to feel stuck whenever I saw objects with messy edges or tangled forms, like leaves, fences, or hands. Negative space drawing gave me a way in. It made the process feel more like solving a puzzle than “being good at art.”
Negative Space Drawing Techniques
There is more than one way to use negative space drawing. Different techniques can help depending on your skill level and subject.
Contour Space Drawing
This technique focuses on the edges where the positive and negative space meet. You draw the boundary between the object and the empty area.
It works well for still life objects, furniture, and organic shapes. It teaches careful observation and helps you avoid lumpy outlines.
Shape Block-In
With shape block-in, you map the empty spaces as simple shapes first. These shapes may look like triangles, trapezoids, or irregular polygons.
This is one of the best methods for beginners. It keeps the drawing simple and helps build the structure before details are added.
Cutout Thinking
This method treats the subject like a cutout, and you pay attention to the holes around it. Think of it like a stencil. The empty spaces become the guide.
It works well for subjects with lots of overlap, like bicycles, branches, or hands holding objects.
Reverse Drawing
In reverse drawing, you may lightly outline the negative shapes first, then fill in the positive shapes later. This can feel unusual at first, but it often produces better accuracy.
I like this method when teaching others. It helps them stop worrying about whether they are “drawing the right thing” and start seeing the composition as a whole.
How to Practice Negative Space Drawing as a Beginner
If you are new to negative space drawing, start small. The best results come from simple subjects and short practice sessions. You do not need expensive tools or advanced skills.
Use this beginner routine:
- Pick an object with clear gaps or openings.
- Place it against a plain background.
- Draw only the empty spaces first.
- Keep your lines light at the start.
- Compare the spaces, not just the object edges.
- Correct proportions before adding details.
Good beginner subjects include:
- A chair
- A houseplant
- A pair of scissors
- A mug with a handle
- A bicycle wheel
- A hand resting on a table
A helpful tip is to turn your drawing upside down. This can make the object feel less familiar and help you focus on the shapes. I’ve used this trick many times when my brain wanted to “name” the object instead of really seeing it.
Common Mistakes to Avoid
Negative space drawing is simple in concept, but beginners often trip over the same problems. Knowing these ahead of time saves a lot of frustration.
Common mistakes include:
- Drawing the object first and the space second
- Over-detailing too early
- Ignoring proportions between spaces
- Using heavy lines too soon
- Picking a subject that is too complex
Another mistake is expecting the drawing to look perfect right away. Negative space drawing is more about training your eye than making a finished masterpiece on the first try. If the spaces look odd, that may mean you are finally seeing them correctly.
Negative Space Drawing for Art and Design
Negative space drawing is not just for beginner sketching. It is also a major tool in art, graphic design, illustration, and logo design.
Designers often use negative space to create visual balance and hidden meaning. A famous logo or poster may use the empty area to reveal a shape, symbol, or message. This makes the design more memorable and often more elegant.
In fine art, negative space can create mood and focus. A figure surrounded by wide open space can feel lonely, calm, or dramatic. In a busy composition, negative space can give the viewer room to breathe.
This is why many professional artists study positive and negative space together. They are not separate ideas. They work like dance partners.
Materials You Can Use
You do not need fancy supplies to practice negative space drawing. Basic tools are enough.
Useful materials include:
- Pencil
- Eraser
- Sketchbook
- Black marker
- Charcoal
- Plain paper
- Reference photos or real-life objects
If you want to make the exercise harder, use a dark pencil or marker and limit erasing. That forces you to commit to shapes and think more carefully before each line.
Negative Space Drawing and Composition
Composition is one of the biggest reasons artists keep returning to negative space drawing. The empty areas around a subject affect how the whole image feels.
Well-used negative space can:
- Create balance
- Draw attention to the subject
- Improve readability
- Add tension or calm
- Make a drawing feel more open
A crowded composition can feel stressful. Too much empty space can feel lonely or minimal. The key is to use negative space with intention. In my own work, I often check the spaces after finishing a sketch. If something feels off, it is usually the spacing, not the object itself.

Advanced Ways to Improve Your Skills
Once you understand the basics, you can push negative space drawing further. This is where the practice becomes really rewarding.
Try these advanced ideas:
- Draw complex objects like bikes, stair rails, or hands
- Use high contrast subjects with strong shapes
- Work from life instead of only photos
- Limit your time to 5 or 10 minutes per sketch
- Focus on one color or value level at a time
You can also combine negative space drawing with value studies. This helps you understand how light and shadow affect the empty areas. In many drawings, shadow shapes are just another form of negative space.
How Negative Space Drawing Helps You Grow as an Artist
Negative space drawing teaches patience, discipline, and visual honesty. It shows you what is actually on the page, not what you think should be there.
Over time, it can improve:
- Line confidence
- Shape recognition
- Visual memory
- Patience with detail
- Artistic problem solving
That is why many instructors use it in early art training. It builds a strong foundation that helps with portrait drawing, still life, figure drawing, and even digital art. The better you understand space, the better you understand structure.
Frequently Asked Questions About Negative Space Drawing
What is the main purpose of negative space drawing?
The main purpose is to improve observation by drawing the empty areas around objects. This helps you see shapes more clearly and reduce drawing mistakes based on assumptions.
Is negative space drawing good for beginners?
Yes, it is one of the best exercises for beginners. It simplifies complex subjects and teaches you how to look carefully before drawing.
What subjects work best for negative space drawing?
Subjects with clear gaps and strong outlines work best, like chairs, plants, bicycles, and hands. These objects make the empty shapes easier to notice and draw.
Can negative space drawing help with realism?
Yes, it can help a lot with realism because realism depends on accurate shape and proportion. When you draw the spaces correctly, the object often looks more believable too.
Do I need special tools for negative space drawing?
No, simple tools like a pencil and paper are enough. A sketchbook and a plain background can make practice even easier.
Conclusion
Negative space drawing is a simple idea with powerful results. By focusing on the space around objects, you train your eye to see more clearly, draw more accurately, and build stronger compositions. It is one of those skills that feels small at first but keeps paying off as you practice.
If you want to improve your art, start with one everyday object and draw the spaces around it today. The more you practice negative space drawing, the more natural it becomes. Keep experimenting, stay patient, and explore more drawing techniques to strengthen your skills.