
Charcoal pencil drawing creates rich shadows, soft blends, and bold, dramatic contrast.
Charcoal pencil drawing is one of the most expressive ways to make art on paper. It lets you build deep darks, smooth gradients, and lifelike texture with tools that feel simple but can do a lot. In this guide, I’ll walk you through what charcoal pencil drawing is, how it works, the supplies you need, and the techniques that help you get cleaner, more confident results.
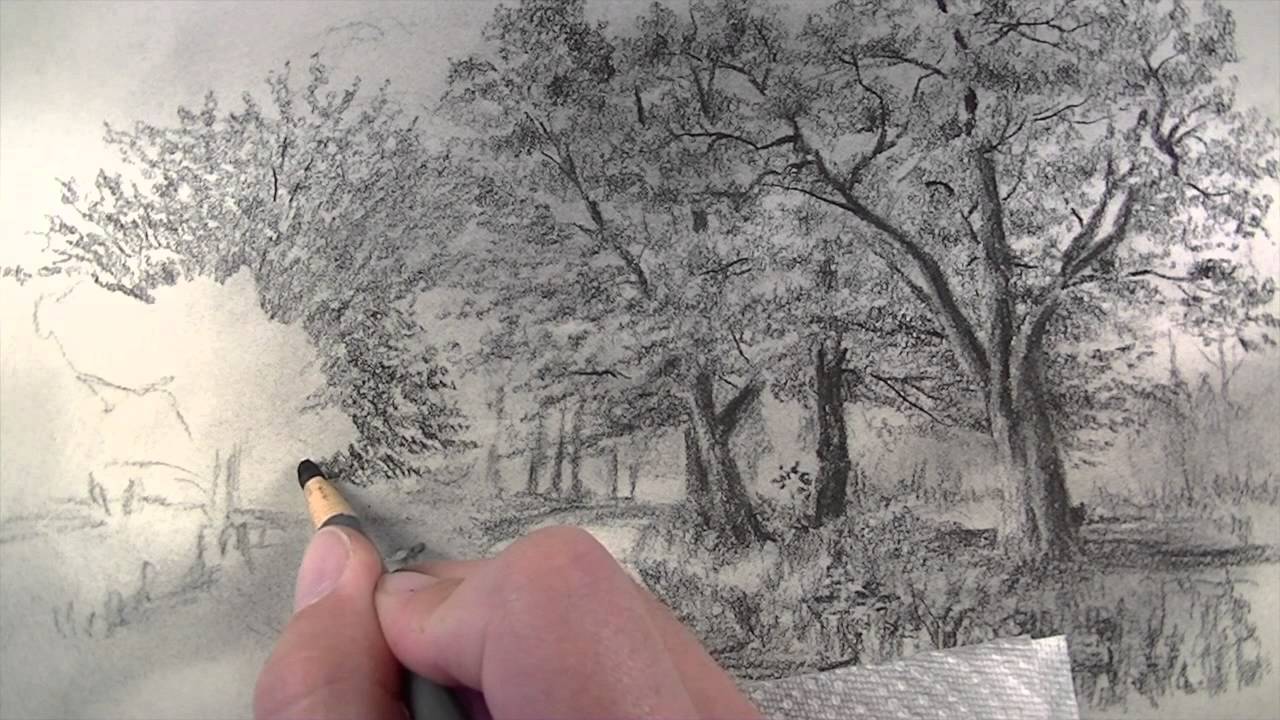
What Is Charcoal Pencil Drawing?
Charcoal pencil drawing is the use of compressed charcoal in pencil form to create artwork on paper. Unlike a soft vine charcoal stick, a charcoal pencil gives you more control, cleaner lines, and sharper detail. Artists often use it for portraits, still life, figure studies, landscapes, and dramatic sketch work.
Charcoal is made from burned organic material, usually wood. When pressed into pencil form, it becomes easier to handle and less messy than loose charcoal. That makes charcoal pencil drawing a favorite for beginners and professionals who want both precision and mood.
In my own experience, charcoal pencil drawing feels a lot like sculpting with shadows. You are not just drawing the outline of a subject. You are building light, depth, and atmosphere one layer at a time.

Why Artists Love Charcoal Pencil Drawing
Charcoal pencil drawing is popular because it gives fast results with a lot of emotional range. A few strokes can create a soft cheek, a rough tree bark texture, or a stormy sky. That kind of flexibility is hard to beat.
Here are some of the biggest benefits:
- Strong value range: You can get deep blacks and soft grays with ease.
- Easy blending: Charcoal smudges and blends smoothly for realistic shading.
- Good for practice: It helps you learn light, shadow, and form quickly.
- Expressive style: It works well for loose sketches and dramatic art.
- Affordable tools: Most charcoal pencil sets are budget friendly.
One reason I keep returning to charcoal pencil drawing is that it teaches patience. If you rush, the drawing can look flat or muddy. If you slow down, the paper starts to feel alive.
Essential Supplies for Charcoal Pencil Drawing
The right tools make a big difference in charcoal pencil drawing. You do not need a huge kit, but a few solid supplies will help a lot.
Charcoal Pencil Types
There are a few common types of charcoal pencils:
- Vine charcoal pencils: Softer, lighter, and easier to erase
- Compressed charcoal pencils: Darker, richer, and better for bold lines
- Willow charcoal pencils: Great for loose sketching and soft marks
- White charcoal pencils: Useful for highlights on toned paper
Compressed charcoal is the most common choice for finished charcoal pencil drawing because it gives strong contrast. Vine charcoal is useful in the early stages when you want to block in shapes without committing too soon.
Paper Choice
Paper matters more than many beginners expect. Charcoal pencil drawing works best on paper with some tooth, which means a slightly rough surface that holds the charcoal. Smooth paper can still work, but it may not grab the pigment as well.
Good options include:
- Charcoal paper
- Mixed media paper
- Toned drawing paper
- Pastel paper with fine grain
Other Helpful Tools
A few extra tools will make your workflow easier:
- Kneaded eraser for lifting highlights
- Blending stump or tortillon for soft transitions
- Soft brush for removing dust
- Fixative spray to protect finished work
- Masking tape to hold the paper flat
When I first started, I tried using printer paper because it was cheap. It was a mistake. The charcoal slid around, the shading looked patchy, and the paper buckled. Once I switched to proper drawing paper, everything improved.
How Charcoal Pencil Drawing Works
Charcoal pencil drawing works by layering dark pigment on paper to create shape, depth, and texture. The darkest areas usually come first or last, depending on your method. Light areas are often preserved by leaving the paper exposed or lifting pigment with an eraser.
A simple way to think about it is this: charcoal drawing is less about coloring inside lines and more about controlling value. Value means how light or dark something looks. In charcoal pencil drawing, value is what makes a flat sketch feel real.
A useful workflow is:
- Start with a light sketch
- Block in the biggest shadow shapes
- Blend where needed
- Add darker layers slowly
- Lift highlights near the end
- Refine edges and texture
This slow buildup keeps the drawing from becoming muddy. It also gives you room to correct mistakes before they become too heavy.

Basic Techniques for Charcoal Pencil Drawing
Learning a few core techniques will improve your charcoal pencil drawing faster than any fancy tool.
Hatching and Cross-Hatching
Hatching uses parallel lines to create tone. Cross-hatching adds another set of lines over the first one. These methods are great when you want texture and structure without heavy blending.
Blending
Blending softens harsh marks and creates smooth shadows. You can blend with a stump, tissue, cotton swab, or even your finger, though I prefer tools that keep oils off the paper. Overblending can make the drawing look dull, so use it with care.
Layering
Layering means building darks in stages. This is one of the most important habits in charcoal pencil drawing. Start light, then deepen the shadows slowly.
Lifting
Lifting removes charcoal to create highlights. A kneaded eraser works well for this because it can be shaped into a point or flat edge. This technique is especially helpful for hair, eyes, metal, and reflected light.
Scumbling
Scumbling uses small, looping marks to build texture. It works well for skin, clouds, fabric, and rough surfaces. It can also help avoid the overworked look that sometimes happens in charcoal pencil drawing.
Step-by-Step Charcoal Pencil Drawing Process
If you want better results, a clear process helps a lot. Here is a simple method I use and recommend.
-
Plan the composition
Lightly sketch the subject using a charcoal pencil or a faint underdrawing. -
Block in major shadows
Find the biggest dark areas first. This helps you establish structure early. -
Build midtones
Add the middle values that connect the light and dark areas. -
Blend selectively
Soften only the spots that need a smooth finish. -
Deepen darks
Reinforce the darkest parts for contrast and depth. -
Add highlights
Use a kneaded eraser or white charcoal pencil where needed. -
Clean the edges
Sharpen key outlines and soften areas that should fade. -
Fix and protect
Spray fixative if the drawing is complete and fully dry.
I have found that students often jump too quickly into details. The drawing then looks busy but not solid. If you get the big shadows right first, the details will usually fall into place more naturally.
Best Subjects for Charcoal Pencil Drawing
Charcoal pencil drawing works well for many subjects, but some are especially rewarding.
Portraits
Portraits are one of the best uses of charcoal pencil drawing. Skin, hair, eyes, and facial shadows all respond well to soft blending and strong contrast.
Still Life
Objects like fruit, bottles, cups, and fabric folds are great for learning form and light. Still life is also a good way to practice edges and texture.
Animals
Fur, feathers, and eyes can look very lifelike in charcoal pencil drawing. The medium works especially well for dramatic animal portraits.
Landscapes
Trees, clouds, rocks, and distant mountains all benefit from charcoal’s soft value range. It is a great choice if you want a moody or atmospheric scene.
Common Mistakes in Charcoal Pencil Drawing
Even experienced artists make mistakes with charcoal pencil drawing. The good news is that most of them are easy to fix once you notice them.
Common problems include:
- Pressing too hard too early
- Using paper that is too smooth
- Overblending and losing texture
- Ignoring light values
- Smudging the drawing with your hand
- Adding details before the structure is set
One mistake I still see often is trying to make every part equally finished. Real drawings need contrast in focus. Some areas should be sharp, while others should stay soft and quiet.
How to Improve Your Charcoal Pencil Drawing Skills
If you want to get better faster, practice with intention. Repeating random sketches is fine, but focused practice gives better results.
Try these habits:
- Draw simple objects in different lighting
- Practice value scales from light to dark
- Copy small sections of master drawings
- Work from life when possible
- Use toned paper to study highlights and shadows
- Time yourself for short sketch sessions
A helpful exercise is to draw the same object three times:
- Once with only line
- Once with only shadow shapes
- Once with full detail
This builds real control. It also teaches you how charcoal pencil drawing depends on seeing values, not just outlines.
Charcoal Pencil Drawing for Beginners
If you are new to charcoal pencil drawing, keep it simple at first. Your first goal is not perfection. Your first goal is learning how charcoal behaves.
Start with:
- A few pencils in different softness levels
- One kneaded eraser
- One blending stump
- Good drawing paper
- A reference photo with strong light and shadow
Begin with objects like apples, mugs, or simple faces. These subjects teach form without overwhelming you. The biggest beginner win is learning to trust the process and work in layers.
Charcoal Pencil Drawing vs Graphite Drawing
Charcoal pencil drawing and graphite drawing may look similar, but they feel quite different.
Charcoal pencil drawing:
- Gives darker blacks
- Blends more easily
- Has a softer, more dramatic look
- Smudges more easily
- Works well for expressive art
Graphite drawing:
- Is smoother and shinier
- Holds fine detail well
- Smudges less aggressively
- Often looks cleaner and more controlled
If you want mood, contrast, and bold shadows, charcoal pencil drawing is often the better choice. If you want precision and a polished finish, graphite may be easier.
How to Preserve Charcoal Pencil Drawings
Charcoal can smudge even after you finish the piece. That is why preservation matters.
To protect your work:
- Use fixative spray in light layers
- Let each layer dry fully
- Store drawings flat
- Place glassine paper between sheets
- Avoid touching the surface directly
Keep in mind that fixative can slightly change the look of the drawing. It may darken some areas or reduce softness a little. That is normal, so test it on a practice piece first.
Frequently Asked Questions
What is the best paper for charcoal pencil drawing?
The best paper usually has some texture, or tooth, so it can hold the charcoal well. Charcoal paper, mixed media paper, and toned drawing paper are all strong choices.
Can beginners learn charcoal pencil drawing easily?
Yes, beginners can learn it fairly quickly because charcoal responds fast and is easy to blend. The main challenge is controlling smudges and avoiding overly dark marks too soon.
Do I need fixative for charcoal pencil drawing?
Fixative is helpful because it protects the finished drawing from smudging. It is not always required for practice sketches, but it is a smart choice for finished art.
Why does my charcoal drawing look muddy?
Muddy drawings usually happen when too much blending or too many layers mix together. Try working slower, keeping some texture, and protecting your light areas early.
Is charcoal pencil drawing good for portraits?
Yes, charcoal pencil drawing is excellent for portraits because it handles skin tones, shadows, and hair very well. It also helps create depth and mood without needing bright color.
Conclusion
Charcoal pencil drawing is a powerful and rewarding art form because it combines control, depth, and expression in one medium. With the right paper, simple tools, and a steady layering process, you can create drawings that feel rich and alive.
If you are just starting out, focus on values, not perfection. Practice often, keep your marks simple, and let each drawing teach you something useful. Try one new technique in your next sketch, and you may be surprised by how quickly your charcoal pencil drawing improves.