
Vine charcoal technique is a soft drawing method that builds tone, form, and movement with ease.
If you have ever wanted a drawing medium that feels light, responsive, and forgiving, the vine charcoal technique is worth your time. I have used it for quick gesture sketches, tonal studies, and full figure drawings, and it stays one of the best tools for learning how to see like an artist. In this guide, I’ll walk you through how the vine charcoal technique works, why artists trust it, and how to use it well in real practice.
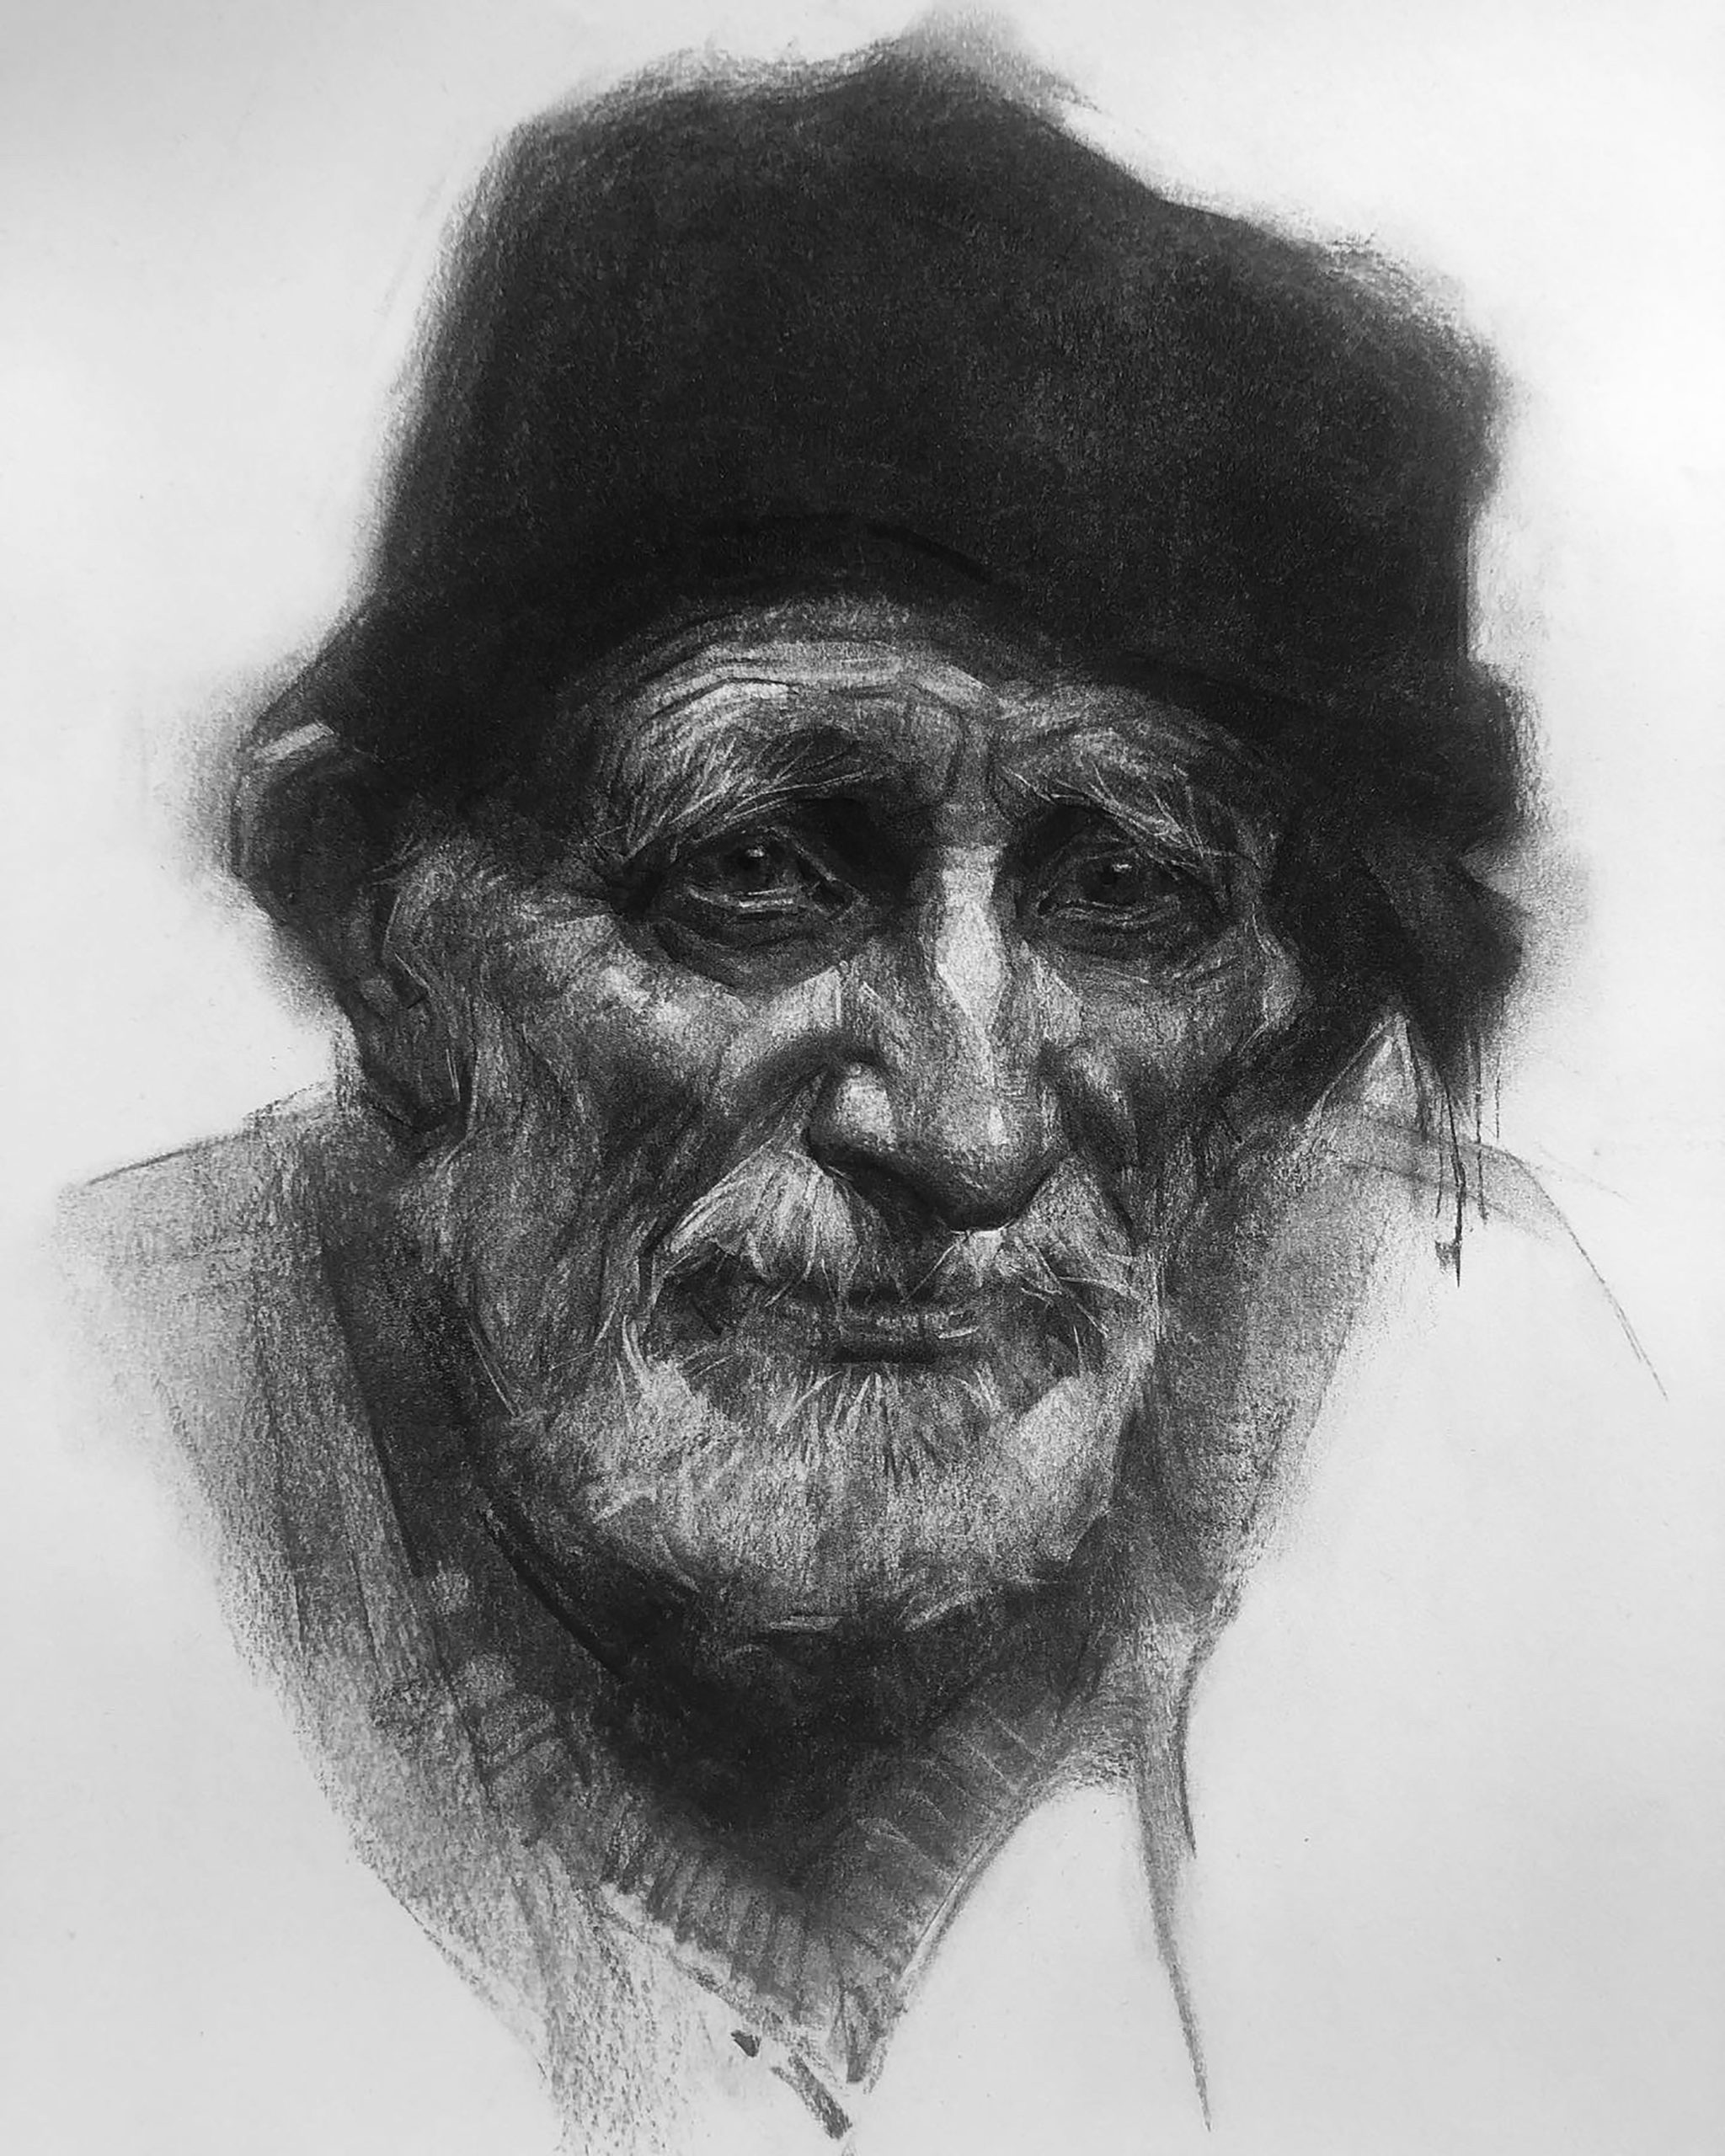
What Is Vine Charcoal Technique?
Vine charcoal technique is a drawing method that uses thin sticks of charred vine wood to create soft, erasable marks on paper. It is popular in figure drawing, gesture drawing, and early composition work because it gives artists a wide range of values without a heavy line. The marks feel airy and natural, which makes vine charcoal technique ideal for study and exploration.
Unlike compressed charcoal, vine charcoal is made by burning natural vine wood in a low-oxygen environment. That process creates a very light, powdery drawing tool. It glides across paper with a dry, delicate touch, so artists can block in shapes fast and adjust them often.
In my own work, I have found vine charcoal technique especially useful when I want to stop thinking about detail and focus on structure. It encourages you to draw with your eye first, not your fear. That alone can make a huge difference for beginners and trained artists alike.
Why Artists Use Vine Charcoal Technique
Artists use vine charcoal technique because it is flexible, forgiving, and great for training the eye. It lets you make soft lines, erase easily, and build dark areas slowly. That makes it one of the best tools for studying proportions, light, and shadow.
Here are some of the biggest benefits:
- Easy to erase and rework, which helps with corrections
- Great for loose sketching and gesture drawing
- Produces subtle tones instead of harsh marks
- Helps artists focus on composition and value
- Works well in classrooms, studios, and plein air studies
The technique also teaches control. Since the marks are light, you learn to layer carefully and avoid rushing. That slower build is valuable, especially when you are learning to observe shape and depth.
Materials You Need for Vine Charcoal Technique
You do not need a lot of gear to start with vine charcoal technique. In fact, one reason artists love it is that the setup is simple and affordable. A few basic tools are enough to begin drawing well.
Common supplies include:
- Vine charcoal sticks in a few sizes
- Charcoal paper or textured drawing paper
- A kneaded eraser
- A soft brush or tissue for blending
- A fixative spray for finished work
- A drawing board or firm surface
Paper matters more than many beginners think. A slightly textured surface helps the charcoal grip the page better. Smooth paper can work, but it may not hold the soft dust as well, which affects the final look.
How the Vine Charcoal Technique Works
The vine charcoal technique works by building form in layers, starting with light marks and moving toward darker values. You usually begin with a loose sketch, then refine proportions, and finally deepen the shadows. The process is more like shaping smoke than carving stone.
A simple workflow looks like this:
- Hold the charcoal lightly for broad, soft marks.
- Block in the main shapes with very little pressure.
- Check proportions and angles before adding detail.
- Use a kneaded eraser to lift out highlights or correct mistakes.
- Add darker accents only after the structure feels right.
When I teach this method, I often tell people to think of it as a conversation with the page. You do not need to force every line at once. Let the drawing grow in stages, and it will usually look more alive.
Step-by-Step Vine Charcoal Technique for Beginners
If you are new to vine charcoal technique, keep the first few drawings simple. The goal is not perfection. The goal is to get used to the feel of the tool and how it behaves on paper.
1. Start with a loose gesture
Begin by capturing the movement or general pose. Do not worry about details yet. Try to draw the energy of the subject first, the way you might sketch the rhythm of a song before writing the notes.
2. Block in basic shapes
Look for large forms like the head, torso, arms, or main objects. Use simple ovals, rectangles, and lines to map them out. This helps keep the drawing balanced from the start.
3. Check proportions
Compare sizes, angles, and distances. I have seen many strong drawings go off track because the first shapes were not checked early enough. Vine charcoal technique makes correction easier, so use that freedom.
4. Add midtones and shadows
Once the structure feels stable, start building darker values. Use side strokes for wider shading and the tip for narrow marks. This is where the drawing begins to gain depth.
5. Lift highlights
Use a kneaded eraser to pull out lights from the charcoal layer. This is one of my favorite parts of the process because it feels like sculpting with light. The erased areas can become highlights on the nose, cheek, fabric folds, or background edges.
6. Finish with restraint
A common mistake is overworking the drawing. Vine charcoal technique often looks best when you stop before every edge is polished. A little softness keeps the piece fresh and natural.
Best Drawing Techniques for Vine Charcoal
Vine charcoal technique becomes more powerful when you know how to handle the marks. Different strokes can change the mood of the drawing fast. Small shifts in pressure and direction make a big visual difference.
Useful methods include:
- Hatching for controlled tone
- Cross hatching for deeper shadows
- Side shading for broad value blocks
- Smudging for soft transitions
- Erasing for light and edge control
If you want smoother shading, keep your pressure light and build in layers. If you want more texture, let the grain of the paper show through. That contrast can add life to landscapes, portraits, and still life drawings.
Common Mistakes to Avoid
Even though vine charcoal technique is forgiving, it still has a learning curve. Most problems come from pressing too hard, blending too soon, or trying to finish too quickly. I made all of those mistakes when I started, and they are common.
Watch out for these issues:
- Pressing too hard at the beginning, which limits correction
- Smudging everything before the form is set
- Using too much blending and losing structure
- Ignoring proportion checks
- Adding darks before the light sketch is accurate
The best fix is patience. Keep the first stage light. If the drawing stays open and flexible, you will have room to improve it without fighting the paper.
Vine Charcoal vs. Compressed Charcoal
Vine charcoal technique is often compared with compressed charcoal, and for good reason. They are related tools, but they behave very differently. Knowing the difference helps you choose the right one for the job.
Vine charcoal is:
- Lighter in tone
- Easier to erase
- Better for sketching and layout
- More fragile and dusty
Compressed charcoal is:
- Darker and richer
- Better for deep shadows
- Harder to erase
- More suited for finished contrast work
Many artists use both together. I often start with vine charcoal technique to map the drawing, then bring in compressed charcoal only at the end if I want stronger contrast. That combination gives me both freedom and power.
Practical Uses of Vine Charcoal Technique
Vine charcoal technique works in many kinds of drawing, not just figure studies. It is a strong choice whenever you need speed, flexibility, and a soft visual result. That is why it shows up in schools, studios, and professional sketchbooks.
Common uses include:
- Gesture drawing
- Life drawing
- Portrait studies
- Still life composition
- Landscape thumbnails
- Value studies for painting
It is also helpful before painting because it teaches you to see big value shapes. Many painters use charcoal studies to test light and shadow before opening a paint tube. That habit can save time and improve planning.
Tips for Better Results with Vine Charcoal Technique
A few small habits can make your vine charcoal technique much stronger. None of them are complicated, but together they improve clarity and control. Think of them like good posture for drawing.
Try these tips:
- Work from large shapes to small details
- Use your whole arm for broad marks
- Keep a kneaded eraser nearby
- Rotate the paper if the angle feels awkward
- Fix the drawing only when you are ready
- Store charcoal sticks safely so they do not snap
One thing I learned the hard way is that a strong drawing often comes from restraint, not force. If you keep your marks simple early on, your final work usually looks cleaner and more confident.
Historical and Artistic Context
Charcoal drawing has a long history in art, especially in preparatory sketches and academic studies. Artists have used charcoal for centuries because it is practical, expressive, and easy to revise. Vine charcoal technique fits into that tradition by offering a very natural, less compressed drawing experience.
Many classical drawing systems emphasize seeing value, proportion, and gesture before detail. Vine charcoal supports that approach well. It gives artists room to think visually instead of getting stuck on final edges too early.
In modern studios, the medium remains relevant because it bridges observation and expression. It is simple enough for beginners, yet nuanced enough for advanced work. That balance is part of why it has stayed useful for so long.
Who Should Learn Vine Charcoal Technique?
Vine charcoal technique is useful for almost anyone who wants to improve drawing skills. Beginners benefit because the tool is forgiving. Advanced artists benefit because it helps them work faster and think more clearly about shape and value.
It is especially good for:
- Students learning proportion
- Artists practicing figure drawing
- Painters who want value studies
- Sketchbook users who like loose, expressive marks
- Anyone building confidence in observation
If you struggle with perfectionism, this medium can be a relief. It lets you make mistakes without feeling trapped. That can be a surprisingly powerful way to grow.
Frequently Asked Questions
What is vine charcoal technique used for?
Vine charcoal technique is used for sketching, gesture drawing, value studies, and early composition work. It helps artists draw lightly, erase easily, and build form in stages.
Is vine charcoal good for beginners?
Yes, vine charcoal is one of the best tools for beginners because it is easy to correct and encourages loose drawing. It teaches proportion, light, and shadow without making the process feel too permanent.
How do you keep vine charcoal drawings from smudging?
Use a fixative spray after the drawing is complete, and avoid dragging your hand across the page. A sheet of clean paper under your drawing hand can also help reduce smudges while you work.
Can you blend vine charcoal with your fingers?
You can, but use caution. Finger blending can soften shadows, though it may also muddy the drawing if overused, so a tissue, stump, or soft brush is often a cleaner choice.
What paper works best for vine charcoal technique?
Textured drawing paper or charcoal paper works best because it grips the charcoal well. Smooth paper can be used, but it usually holds less powder and may look lighter.
How is vine charcoal different from regular charcoal?
Vine charcoal is softer, lighter, and easier to erase than compressed charcoal. Regular compressed charcoal gives deeper blacks and stronger contrast, while vine charcoal is better for loose structure and early sketching.
Conclusion
Vine charcoal technique is one of the most useful and approachable drawing methods you can learn. It gives you freedom to explore, correct, and build a drawing step by step without pressure. If you want to improve your eye, your control, and your confidence, this is a great medium to practice often.
The real strength of vine charcoal technique is that it teaches you to see before you finish. Start light, stay patient, and let each drawing teach you something new. If this guide helped, keep experimenting, save your favorite tips, and explore more drawing resources or leave a comment with your own experience.