
Graphite cross hatching is a shading method that builds tone and texture with layered pencil lines.
If you have ever tried to make a drawing feel more alive, graphite cross hatching is one of the most useful skills you can learn. It is simple at first glance, but once you understand how line direction, pressure, and spacing work together, it can create rich depth, soft shadows, and crisp form with very little equipment.
What Graphite Cross Hatching Means
Graphite cross hatching is a drawing technique where you place sets of parallel pencil lines over one another at different angles. The overlapping lines create value, which is the lightness or darkness of a drawing. Artists use graphite cross hatching to suggest shadow, volume, texture, and mood without smudging or blending.
I have found that this method works especially well when you want control. Unlike heavy blending, graphite cross hatching keeps the drawing clean and expressive. Every line matters, and that is part of the appeal.
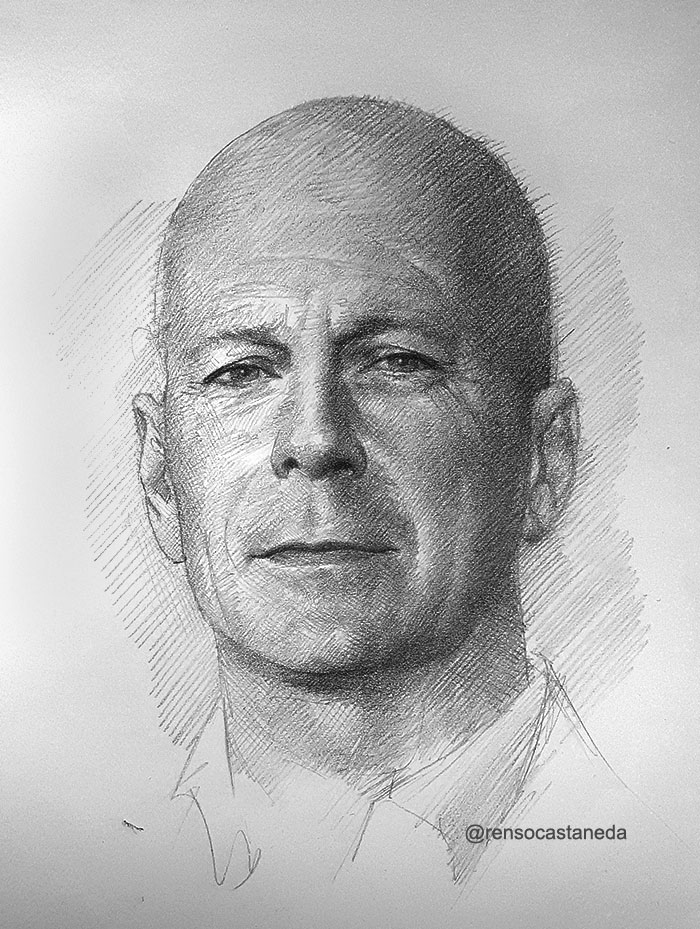
Why Artists Use Graphite Cross Hatching
Graphite cross hatching has stayed popular for a long time because it is flexible, affordable, and precise. You can use it for quick sketches, detailed portraits, still life studies, architectural drawings, and conceptual art. It also gives a drawing a handmade look that feels honest and direct.
A few reasons artists rely on graphite cross hatching:
• It builds tone without needing special tools
• It works well for both rough sketches and polished finished work
• It helps develop observation skills
• It gives better edge control than smudging alone
• It can create strong texture in hair, fabric, stone, wood, and skin
In my own practice, graphite cross hatching became a go-to method when I needed consistent shadows without losing structure. It taught me to think like a sculptor, not just a sketcher.
How Graphite Cross Hatching Works
The technique is based on simple visual logic. A single set of lines creates a light tone. Add more lines, tighten the spacing, or layer them at a new angle, and the value becomes darker. The eye blends the marks from a distance, even though the page still shows individual lines up close.
Here is the basic process:
- Draw a first layer of evenly spaced lines in one direction.
- Add a second layer crossing the first at a different angle.
- Increase the density where you want darker shadow.
- Leave more open space where you want light to show through.
- Repeat with light pressure until the tone looks balanced.
A useful way to think about graphite cross hatching is like weaving cloth. Each line is a thread. The more carefully you weave them, the stronger and more detailed the final image becomes.
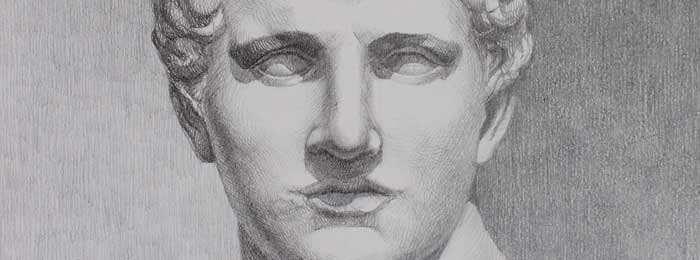
Best Graphite Pencils and Paper for Cross Hatching
The tools you choose matter more than many beginners expect. Different graphite grades change the feel of the line and the final tone. Paper texture also affects how well the pencil catches and layers.
Pencil grades
• HB and 2H are good for light planning and early layers
• B and 2B are useful for midtones
• 4B to 8B are helpful for dark areas and bold contrast
I usually recommend starting with an HB, 2B, and 4B set. That combination gives enough range for most graphite cross hatching studies without feeling overwhelming.
Paper choice
• Smooth paper supports cleaner lines and finer detail
• Medium tooth paper holds more graphite and more layers
• Very rough paper can break up the line too much for delicate work
If you want crisp graphite cross hatching, a smooth bristol sheet often works well. If you want a grainier, more expressive feel, lightly textured drawing paper can add character.
Techniques for Stronger Graphite Cross Hatching
Good graphite cross hatching is not about filling space fast. It is about building tone with patience and intention. The strongest drawings usually come from careful line planning and consistent pressure.
Keep line direction purposeful
Line direction should follow the form whenever possible. For example, curved lines around a cheek or apple can make the object feel round. Straight, angled lines can suggest hard surfaces like metal, wood, or buildings.
Control pressure
Light pressure lets you layer without bruising the paper. Heavy pressure can flatten the surface and limit later adjustments. In my experience, beginners often press too hard too soon, which makes the drawing look stiff.
Vary spacing
Tight spacing creates darker tones. Wider spacing creates softer tone. This simple change can add a lot of realism without making the drawing muddy.
Change angles slowly
Cross hatching often looks best when each new layer has a clear purpose. If every angle changes too randomly, the drawing can lose structure. Use angles that support the shape, not just fill the page.
Keep edges clean
One of the biggest benefits of graphite cross hatching is edge control. A sharp edge helps define form, while a softer edge can suggest distance, shadow, or atmosphere. Use that contrast on purpose.
Common Mistakes to Avoid
I have seen the same problems come up again and again, especially with newer artists. The good news is that most of them are easy to fix once you know what to watch for.
Common mistakes include:
• Making all lines the same length and direction
• Pressing too hard in the first layer
• Darkening everything equally
• Ignoring the form of the subject
• Overworking the paper until it looks flat
• Using too many layers before planning the light source
One mistake I made early on was trying to “finish” a shadow too quickly. The result looked dirty instead of dimensional. Once I slowed down and let the tone build gradually, the work became cleaner and more convincing.
How to Practice Graphite Cross Hatching
Like most drawing skills, graphite cross hatching improves fastest with focused practice. You do not need elaborate subjects at first. Simple shapes are often the best teachers.
Try these practice exercises:
- Draw rows of straight lines at different angles.
- Fill small boxes with increasing line density from light to dark.
- Shade a sphere using only cross hatching.
- Try a cube or cylinder and follow the form with your lines.
- Draw a fabric fold or leaf to practice texture.
A helpful exercise is to make a value scale using only graphite cross hatching. Start with almost no lines and move toward dense layering. This teaches control much faster than random sketching.
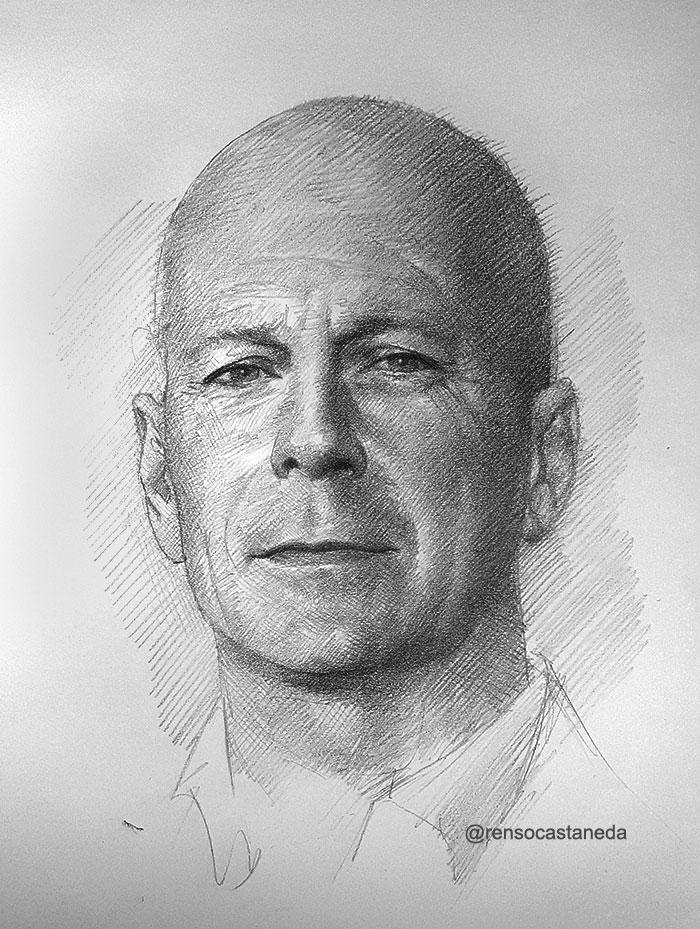
Graphite Cross Hatching for Realistic Drawing
If your goal is realism, graphite cross hatching can be a powerful tool. It works well because realism depends on value relationships more than on perfect outlines. The right arrangement of light and dark often matters more than tiny details.
For realistic drawing, focus on three things:
• Accurate shadows
• Gradual value transitions
• Consistent light source direction
When I work on portraits, I often use graphite cross hatching first to map the structure of shadow. Then I add denser layers only where needed. That keeps the face looking natural instead of overworked.
Texture Effects You Can Create
Graphite cross hatching is not just for shading. It can also describe texture in a very convincing way. The way you change line shape, spacing, and pressure can suggest different surfaces.
Examples of textures you can create:
• Hair with flowing, repeated line groups
• Fabric with soft, layered strokes
• Skin with subtle, light cross hatching
• Wood grain with directional marks
• Metal with tighter, cleaner line patterns
• Stone with irregular, broken line layers
The key is to match the mark to the material. Smooth materials usually need cleaner, more controlled lines. Rough materials can handle more irregular, broken patterns.
Benefits and Limits of Graphite Cross Hatching
Graphite cross hatching has many strengths, but it also has limits. Knowing both helps you choose it for the right project.
Benefits
• It is precise and expressive
• It works with basic tools
• It is easy to revise in stages
• It helps build discipline and observation
• It creates strong value control
Limits
• It takes time to master
• It can look scratchy if overdone
• Very dark blacks can be harder to achieve than with charcoal or ink
• It may not suit every style, especially very painterly work
In practice, I think of graphite cross hatching as a bridge between drawing and design. It gives structure first, then atmosphere. That makes it ideal for artists who value clarity and detail.
Professional Tips for Better Results
If you want cleaner, stronger drawings, a few small habits can make a big difference.
• Keep your pencil sharp for line precision
• Rotate the paper instead of twisting your wrist awkwardly
• Step back often to check value balance
• Use a light touch in early layers
• Save the darkest marks for the final stage
• Practice on scrap paper before working on your main piece
A simple rule I follow is this: if the drawing starts looking noisy, pause and simplify. Graphite cross hatching should build form, not clutter it.
Frequently Asked Questions of graphite cross hatching
What is the difference between hatching and cross hatching?
Hatching uses one set of parallel lines to create tone. Cross hatching adds another set of lines over the first at a different angle, which makes darker and more complex shading.
Is graphite cross hatching good for beginners?
Yes, because it teaches line control, patience, and value building. It is also easy to practice with basic pencils and paper, so beginners can improve without much cost.
How do I keep graphite cross hatching from looking messy?
Use light pressure, keep your line direction intentional, and build value in layers. It also helps to leave some open space so the drawing can breathe.
What pencil is best for graphite cross hatching?
An HB or 2B pencil is a great place to start because it gives clean lines and easy layering. Many artists also keep a softer pencil like 4B nearby for darker shadows.
Can graphite cross hatching be used in portraits?
Yes, and it works very well in portraits when you control line direction and value carefully. It can shape faces naturally and give skin and hair a believable structure.
Conclusion
Graphite cross hatching is one of those drawing methods that looks simple until you really study it. Once you understand how line angle, spacing, and pressure work together, it becomes a powerful way to build depth, texture, and realism with clarity.
If you are learning it now, start small, stay patient, and pay attention to the form you are drawing. The more you practice graphite cross hatching, the more natural it becomes, and the more control you will have over your art. Try a few studies today, keep notes on what works, and continue building from there.