
Oil based colored pencils are smooth, rich, and ideal for layered, detailed artwork.
Oil based colored pencils have a loyal following for a reason. They feel clean, precise, and a little more controlled than wax-based pencils, which makes them a favorite for artists who want fine detail, subtle blending, and strong color payoff. If you want to understand how oil based colored pencils work, where they shine, and how to choose the right set, this guide will walk you through the essentials in a practical, friendly way.
What Are Oil Based Colored Pencils?
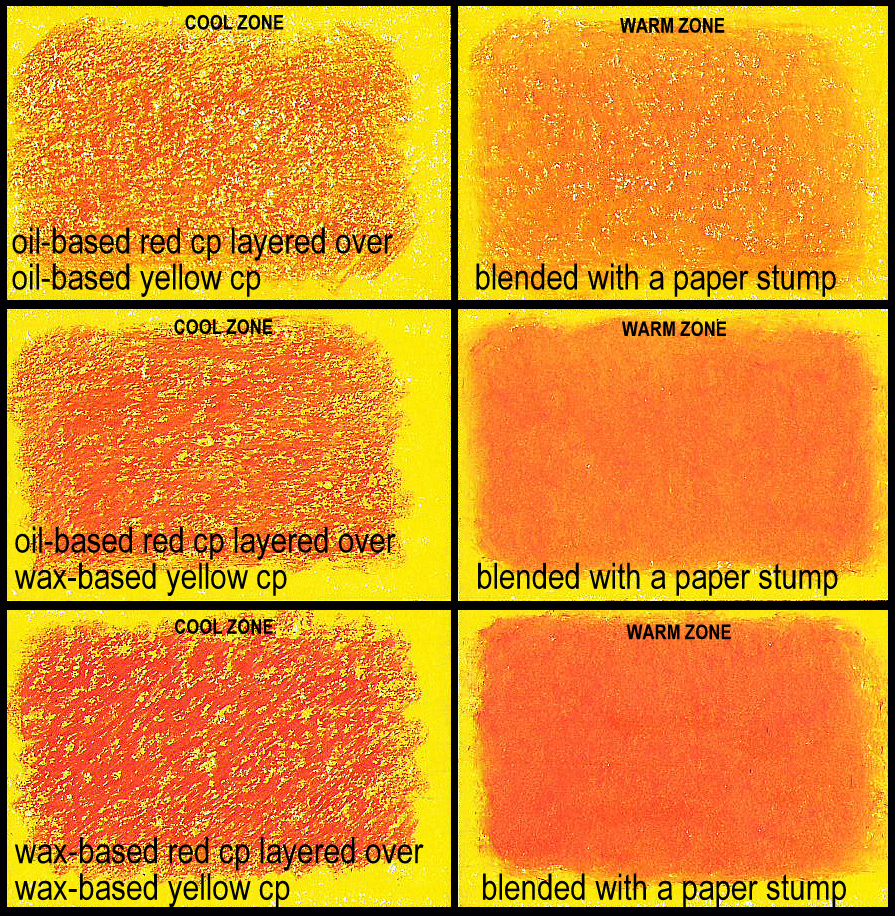
Oil based colored pencils are drawing tools made with pigment, binder, and filler, but their binder is oil-based rather than wax-based. That small change affects how the pencil feels on paper, how it layers, and how long the point stays sharp. In my own experience, they often feel a bit firmer and more precise, which is great when I need clean edges or tiny details.
These pencils are popular with illustrators, designers, and hobby artists because they can produce smooth color without feeling greasy. They also tend to resist the heavy wax bloom that some wax-based pencils can develop over time. If you like artwork that stays crisp and controlled, oil based colored pencils are worth serious attention.
How Oil Based Colored Pencils Work
The core idea is simple: pigment gives color, and the oil binder helps hold that pigment together. Because the binder is not as soft as wax, the pencil core usually feels harder and less crumbly. That is why oil based colored pencils can keep a sharp point longer, especially during detailed work.
The result is a pencil that layers well without becoming muddy too quickly. You can build color slowly, add depth, and keep edges neat. I learned early on that this makes them excellent for fur, feathers, botanical art, and technical sketching where precision matters more than a buttery glide.
Oil Based Colored Pencils vs Wax Based Colored Pencils
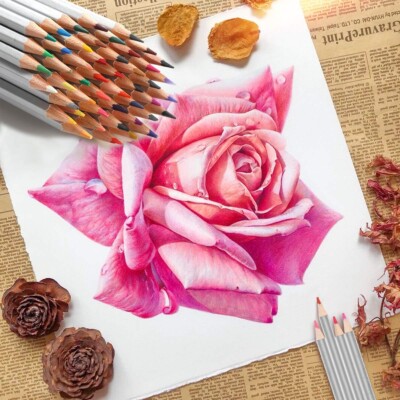
A lot of artists compare these two types first, and for good reason. The difference affects not just feel, but also the final look of the art.
Here is the practical breakdown:
- Oil based colored pencils usually feel firmer and smoother in a controlled way.
- Wax based colored pencils often feel creamier and softer on the page.
- Oil based colored pencils usually hold a point longer.
- Wax based colored pencils may blend faster, but can also create wax bloom.
- Oil based colored pencils are often preferred for fine detail and layered realism.
- Wax based colored pencils can feel more forgiving for quick, soft shading.
If you are new, the choice depends on your style. When I switched between them in the same sketchbook, I noticed oil based colored pencils gave me cleaner control, while wax-based ones gave me a softer, richer first pass.
Key Benefits of Oil Based Colored Pencils
Oil based colored pencils offer several real advantages for both beginners and experienced artists. They are not always the flashiest option, but they are dependable tools that reward patience and technique.
Some major benefits include:
- Better point retention, which helps with detail work
- Smooth layering that supports gradual color buildup
- Less wax bloom on finished pieces
- Strong color consistency across long sessions
- Good control for line work and fine textures
- A cleaner feel on paper for artists who dislike a waxy surface
One thing I appreciate most is how predictable they are. They behave like a pencil should, without surprise smearing or too much softness. That consistency makes them a strong choice for anyone building confidence with colored pencil art.
Common Uses for Oil Based Colored Pencils
Oil based colored pencils are used in many kinds of art and design work. They are versatile enough for casual sketching, but they really shine when accuracy matters.
Common uses include:
- Portrait drawing
- Realistic animal art
- Botanical illustration
- Fashion sketches
- Product and concept art
- Scientific and architectural drawing
- Adult coloring books with detailed line work
In portrait work, they are useful for hair strands, eyelashes, and skin texture. In nature art, they help capture leaf veins, fur, and feather detail. If you like art that rewards patience, oil based colored pencils can feel like a very steady companion.
How to Choose the Best Oil Based Colored Pencils
Not every set is the same, and the right one depends on your goals. I always tell people to think about three things first: pigment quality, core strength, and paper compatibility. A beautiful pencil still needs to work well on the surfaces you actually use.
Look for these features:
- High pigment load for strong color
- Smooth but firm core for layering
- Lightfastness ratings if you want artwork to last
- Good color range for blending and skin tones
- Break resistance for daily use
- A comfortable barrel shape for long sessions
If you are buying your first set, do not chase the biggest set right away. A smaller, well-made set often teaches you more. I have seen artists get better results from 24 good pencils than from 120 weak ones.
Best Paper and Surfaces for Oil Based Colored Pencils
Paper choice matters more than many beginners expect. Oil based colored pencils perform best on paper with enough tooth to catch the pigment, but not so much texture that blending becomes difficult. The surface should support layering without wearing down the pencil too fast.
Good surface choices include:
- Smooth drawing paper for clean lines and details
- Medium tooth paper for balanced layering
- Heavyweight paper for more color buildup
- Bristol board for crisp illustration work
- Colored pencil paper made for multiple layers
When I first used them on very rough paper, I had to press too hard just to fill gaps. That made the work look uneven. A better surface fixed the problem fast and saved both time and frustration.
Techniques That Work Well With Oil Based Colored Pencils
Oil based colored pencils are at their best when you use light layers and patience. Heavy pressure too early can flatten the tooth of the paper and make blending harder later. I learned that lesson the hard way on a portrait where I rushed the base layer and lost a lot of depth.
Try these techniques:
- Layer lightly from light to dark
- Use small circular strokes for smoother coverage
- Burnish only at the end if needed
- Keep the pencil sharp for detailed areas
- Use directional strokes for hair, fur, or fabric
- Test colors on scrap paper before applying them to the final piece
A gentle hand is usually better than a forceful one. Think of it like watering a plant, not flooding it. Slow layers give you more control and a richer finish.
Blending Oil Based Colored Pencils
Blending is one of the biggest reasons artists choose oil based colored pencils. Their firmer structure often makes color transitions look smooth without becoming overly greasy. You can blend with pressure, layering, or tools like colorless blenders, depending on the result you want.
Useful blending methods include:
- Layering similar colors to create gradual transitions
- Using a light touch to merge edges
- Applying a neutral tone to soften contrasts
- Blending with solvent when the paper supports it
- Burnishing for a polished, unified surface
I usually prefer dry blending first because it keeps the artwork flexible. Once you add solvent, the color can become more permanent and less forgiving. That is not bad, but it does change the feel of the piece.
Lightfastness and Archival Quality
If you care about long-lasting art, lightfastness is a big deal. Lightfastness refers to how well a pigment resists fading when exposed to light. This matters whether you are selling artwork or just want your own work to stay vibrant over time.
Many reputable pencil brands publish lightfastness data based on testing methods used in the art supply industry. That gives artists a more trustworthy way to compare durability. Still, not every color in every set performs the same, so checking individual ratings is smart.
For archival work, keep these tips in mind:
- Choose brands with published lightfastness information
- Store finished art away from direct sunlight
- Use UV-protective framing when possible
- Avoid making assumptions based only on price or packaging
Pros and Cons of Oil Based Colored Pencils
Like any art tool, oil based colored pencils have strengths and limits. Knowing both helps you choose wisely and avoid disappointment.
Pros:
- Excellent detail control
- Smooth layering
- Less wax bloom
- Long-lasting point
- Great for realistic art
Cons:
- Can feel firmer than expected
- May take more patience to build deep coverage
- Often cost more than basic student sets
- Some artists prefer the softer feel of wax-based pencils
In my view, the main tradeoff is speed versus precision. If you want quick, soft coverage, another type may feel easier. If you want control and polish, oil based colored pencils often win.
Tips for Beginners Using Oil Based Colored Pencils
If you are just starting out, keep it simple. The biggest mistake I see is pressing too hard too soon. That crushes the paper texture and limits how many layers you can add later.
A better beginner approach is:
- Start with light pressure
- Practice layering on scrap paper first
- Use a limited color palette
- Keep pencils sharpened
- Match your paper to your goal
- Work from light colors to dark colors
Also, do not judge the pencil too fast. Oil based colored pencils often look modest in the first layer, then become much richer as you build them up. That slow transformation is part of their charm.
How to Store and Care for Oil Based Colored Pencils
Good care keeps your tools working well. I have had pencils last far longer when I stored them properly instead of tossing them loose into a bag. Temperature and pressure both matter.
Simple care tips:
- Store pencils flat or upright in a case
- Keep them away from heat
- Avoid dropping sharpened pencils
- Use a quality sharpener that does not split the core
- Wipe dust off finished pieces gently
If a pencil feels scratchy, it may be dull, or the paper may be too rough. Either way, do a quick test before assuming the pencil is bad. Often the fix is easier than expected.
Frequently Asked Questions of oil based colored pencils
Are oil based colored pencils better than wax based ones?
Not always. Oil based colored pencils are better for fine detail, clean layering, and point retention, while wax-based pencils are often softer and creamier. The best choice depends on your style and the look you want.
Do oil based colored pencils blend well?
Yes, they blend very well, especially with light layering and careful pressure control. They may not feel as instantly soft as wax-based pencils, but they can produce very smooth results with practice.
Can beginners use oil based colored pencils?
Absolutely. They are a great choice for beginners who want control and clean results. The main thing to learn is light pressure, since these pencils work best when you build color slowly.
What paper is best for oil based colored pencils?
Medium tooth paper, Bristol board, and paper made for colored pencils are all strong choices. The best paper gives enough texture for layering without making the surface too rough or too slick.
Do oil based colored pencils last longer?
They often do, especially because the cores tend to stay sharp longer and resist wax bloom. With proper storage and lightfast pigments, they can be a strong option for artwork meant to last.
Conclusion
Oil based colored pencils are a smart choice for artists who want control, detail, and smooth layering. They may take a little patience, but they reward careful work with clean lines, rich color, and a polished finish. If you choose the right paper, practice light layering, and pay attention to pigment quality, you will get much better results.
The best way to learn them is simply to start using them. Try a small set, test different papers, and notice how they behave in your hands. If you want, explore more drawing guides, compare pencil brands, and keep building your own style one layer at a time.