
Colored pencil portraits create lifelike art with rich color, soft texture, and remarkable detail.
Colored pencil portraits have a special charm that digital images and paint sometimes miss. They feel personal, warm, and deeply human, like a quiet conversation captured on paper. If you want to understand how colored pencil portraits are made, what makes them stand out, and how to get better results with them, this guide walks you through the full process with practical advice and real-world insight.
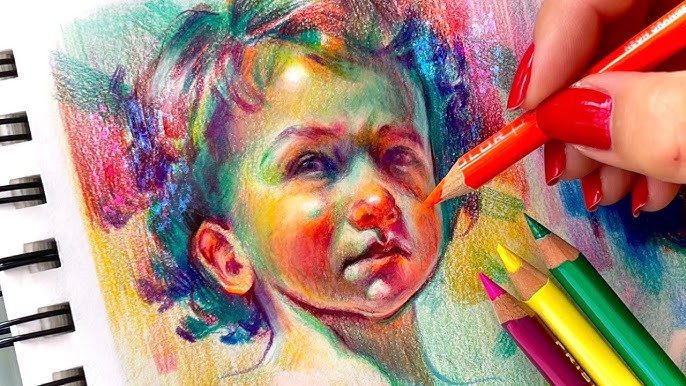
What Colored Pencil Portraits Are and Why They Matter
Colored pencil portraits are drawings made with pigment-based pencils on paper or another textured surface. Artists build them slowly, layer by layer, to capture skin tones, hair, clothing, and expression. The final result can look soft and realistic or bold and stylized, depending on the artist’s approach.
What makes colored pencil portraits so appealing is their balance of control and warmth. You can create fine details like eyelashes and freckles, but you can also keep edges soft for a more natural feel. That mix is one reason colored pencil portraits are popular for family gifts, pet portraits, memorial artwork, and commissions.
In my own work, I’ve found that people often react most strongly to the eyes and skin texture in colored pencil portraits. Those are the areas where the medium can feel almost alive. When done well, the portrait does not just show a face. It shows presence.
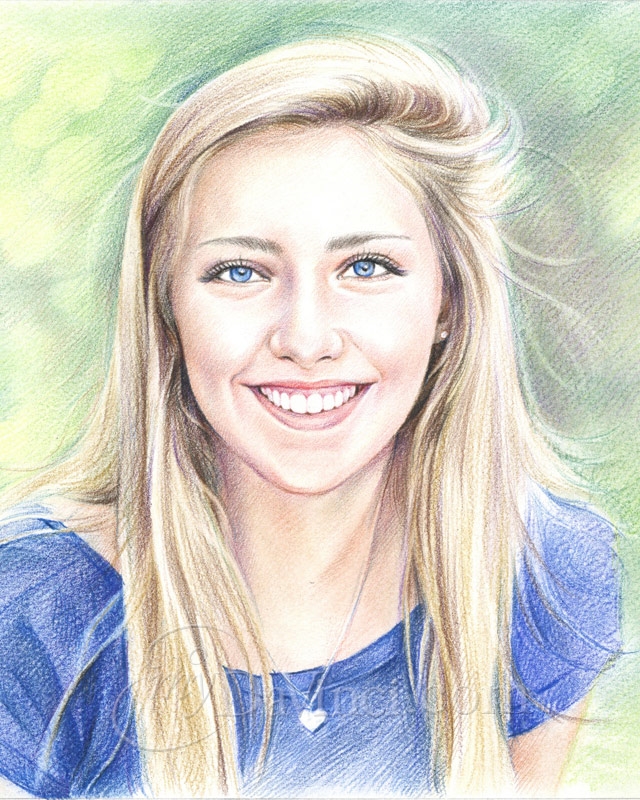
Why Artists and Clients Love Colored Pencil Portraits
Colored pencil portraits have stayed popular for decades because they are flexible, affordable compared with many traditional media, and easy to personalize. They work well for both beginners and professional illustrators. They also store and ship more easily than many paintings, which matters a lot for custom art.
Here are a few reasons colored pencil portraits stand out:
- They allow precise detail without heavy equipment
- They work on small or large formats
- They are easier to revise than many paint-based portraits
- They create a soft, intimate look that many people love
- They suit both realistic and slightly stylized art styles
Clients often choose colored pencil portraits because they feel meaningful. A portrait of a child, parent, grandparent, or pet becomes more than decoration. It becomes a keepsake. That emotional value is a big part of why this medium continues to grow.
Materials That Make a Difference
The quality of colored pencil portraits depends heavily on the tools you use. Cheap supplies can still teach you the basics, but better materials usually lead to smoother color, cleaner layering, and less frustration. This is especially true when you want realistic skin tones or delicate shading.
Colored pencils
There are two main types:
- Wax-based pencils, which feel smooth and blend easily
- Oil-based pencils, which stay sharper longer and often layer well
Professional lines from brands like Faber-Castell, Prismacolor, Caran d’Ache, and Derwent are widely used because they offer stronger pigment and better consistency. I learned early on that pencil quality affects everything from blending to how long your portrait lasts.
Paper
Paper choice matters more than many beginners realize. A smooth paper can help with fine detail, but it may not hold enough layers. A lightly textured, acid-free paper often gives the best balance for colored pencil portraits.
Good paper traits include:
- Acid-free construction for better archival quality
- Enough tooth to hold multiple layers
- A surface that supports smooth blending
- Thickness that resists buckling and damage
Blending and finishing tools
Some artists use:
- Colorless blenders
- Blending pencils
- Soft brushes
- Solvent sparingly, when the paper supports it
- Erasers for highlights and cleanup
I usually tell newer artists not to rely too much on blending tools at first. Strong layering skills matter more. A blender can smooth a surface, but it cannot fix weak values or poor color choices.
How Colored Pencil Portraits Are Made
Colored pencil portraits are built in stages. The process is slower than many people expect, but that slow pace is what creates realism. Think of it like tuning a song one note at a time.
Step 1: Start with a strong reference
A good reference photo is the foundation. It should have clear focus, natural light, and enough detail to show facial structure and skin tone. Blurry photos make portraits much harder because the artist has to guess at values and edges.
Helpful reference tips:
- Use natural light when possible
- Avoid harsh flash unless the look is intentional
- Choose a photo with visible eyes and clean contrast
- Make sure the face is not distorted by a wide-angle lens
Step 2: Make an accurate sketch
The sketch is where proportion issues are solved early. If the eyes are off, the whole portrait can feel wrong no matter how good the shading is. Many artists use grids, tracing, or light construction lines to stay accurate.
A mistake I made many times early in my career was rushing the sketch because I wanted to “get to the fun part.” That always cost me later. Once I slowed down and checked proportions more carefully, my colored pencil portraits improved fast.
Step 3: Build values before color
Values are the light and dark areas that give the face shape. If the values are right, the portrait feels solid. If they are wrong, even beautiful colors can look flat.
A simple workflow is:
- Map the darkest darks first
- Lay in midtones
- Save highlights for later
- Check the portrait in a mirror or flip the reference to spot errors
Step 4: Layer color slowly
Colored pencil portraits often depend on many light layers instead of a few heavy strokes. Light pressure helps the paper hold more pigment and keeps the surface clean. This is one reason realistic colored pencil work can look so polished.
Good layering habits include:
- Use small circular strokes
- Follow the direction of the form
- Mix several colors instead of using one flat skin tone
- Keep edges soft where the face curves
Step 5: Refine details last
Details make people stop and look twice. Hair shine, eyelash direction, lip texture, and tiny catchlights in the eyes all matter. But details only work when the structure beneath them is already strong.
Best Techniques for Realistic Colored Pencil Portraits
Realism comes from control, patience, and observation. It is less about drawing every tiny detail and more about drawing the right ones in the right places. That is a lesson I had to learn the hard way after overworking many early portraits.
Layering
Layering is the heart of colored pencil portraits. Each layer should add depth without crushing the paper tooth. Light pressure keeps the surface open for later adjustments.
Burnishing
Burnishing means pressing harder near the end to create a smooth, polished finish. It can be useful for skin, lips, and glossy hair. Still, use it carefully because once the paper is heavily burnished, it becomes harder to add more layers.
Color mixing on paper
Instead of searching for the perfect pencil color, mix colors on the paper. Skin is rarely one tone. It often includes warm, cool, red, yellow, blue, and even green notes depending on light and shadow.
For example:
- Use warm peach tones for lit areas
- Add muted reds for cheeks and lips
- Use cool grays or blues in shadows
- Use light browns and ochres to unify the face
Edge control
Sharp edges draw attention. Soft edges feel natural. In colored pencil portraits, too many hard edges can make the face look cut out. I often soften jawlines, cheeks, and background edges so the eyes stay the focus.
Common Mistakes to Avoid
Even experienced artists make mistakes in colored pencil portraits. The good news is that most of them are fixable once you know what to look for.
Here are common problems:
- Starting with dark pressure too early
- Using one skin tone for the entire face
- Ignoring the background, which can make the portrait feel unfinished
- Overblending until the drawing looks flat
- Making eyes too detailed too soon
- Skipping value checks
- Choosing poor reference photos
One of the biggest traps is chasing detail before the big shapes are right. A portrait can have perfect eyelashes and still fail if the head shape or light direction is off. Think of the portrait as a house. If the frame is weak, the paint will not save it.
Choosing the Right Style for Your Portrait
Colored pencil portraits can look very different depending on the style you choose. That is part of the medium’s strength. It can fit both sentimental gifts and high-end fine art.
Realistic portrait style
This style aims to show the subject as naturally as possible. It uses careful value shifts, smooth skin transitions, and exact facial details. Realistic colored pencil portraits are popular for commissions because they feel personal and timeless.
Semi-realistic style
This approach softens some features while keeping the likeness strong. It is a great choice if you want a portrait that feels artistic without losing the subject’s identity.
Stylized portrait style
Stylized portraits may use stronger colors, simpler shapes, or more dramatic contrast. They are great for modern decor, children’s portraits, and expressive gifts.
How Colored Pencil Portraits Compare to Other Mediums
Colored pencil portraits are often compared with graphite, watercolor, acrylic, and digital art. Each medium has strengths, but colored pencil sits in a unique space between drawing and painting.
Compared with graphite:
- Colored pencil adds warmth and natural skin tone
- Graphite is better for pure tonal work
- Colored pencil often feels more personal and finished
Compared with watercolor:
- Colored pencil gives more control
- Watercolor can be looser and faster
- Colored pencil is easier for very fine detail
Compared with acrylic or oil:
- Colored pencil is less messy and more portable
- Paint can offer richer surface texture
- Colored pencil often feels more intimate and delicate
From an artist’s perspective, colored pencil portraits are ideal when you want precision without losing softness. That balance is hard to beat.
Tips for Better Colored Pencil Portraits
If you want stronger results, focus on habits that improve both accuracy and finish. Small choices make a huge difference over time.
Try these practical tips:
- Work from light to dark
- Keep your pencils sharp for detail work
- Use a limited palette for skin tones
- Step back often to check proportions
- Test colors on scrap paper before committing
- Protect finished work with a proper fixative if appropriate for your pencil brand
- Store portraits flat and away from direct sunlight
I also recommend taking breaks. Fresh eyes catch mistakes that tired eyes miss. More than once, I fixed a portrait in five minutes after walking away for an hour.
Who Colored Pencil Portraits Are Best For
Colored pencil portraits are a great choice for people who want something heartfelt, detailed, and long-lasting. They work well for:
- Family portraits
- Children’s portraits
- Pet portraits
- Memorial portraits
- Wedding gifts
- Anniversary gifts
- Home decor
- Personal commissions
They are especially meaningful when the goal is emotional connection. A colored pencil portrait can feel like a quiet tribute. It does not shout for attention, but it holds it.
How to Care for Colored Pencil Portraits
Good care helps preserve the artwork for years. Colored pencil portraits are stable when handled and stored properly, but they still need protection.
Best care practices include:
- Frame the portrait under UV-protective glass if possible
- Keep it out of direct sunlight
- Avoid humid rooms
- Use archival matting and backing
- Handle the paper by the edges
- Store unframed work in a clean, flat portfolio
Archival materials matter because some papers and pencils may fade over time if exposed to light or poor storage. Many museums and conservation sources recommend acid-free, light-protected display for works on paper, and that advice fits colored pencil portraits well.
Frequently Asked Questions
What are colored pencil portraits used for?
Colored pencil portraits are often used for gifts, memorial art, family keepsakes, and home decor. They are also popular for custom commissions because they feel personal and detailed.
Are colored pencil portraits long-lasting?
Yes, they can last a long time when made with archival materials and stored properly. The biggest risks are light exposure, moisture, and poor-quality paper.
How long does a colored pencil portrait take?
It depends on size, detail level, and experience. A small portrait may take several hours, while a large, highly realistic one can take many days.
What paper is best for colored pencil portraits?
A high-quality, acid-free paper with a moderate tooth is usually best. Smooth paper works for detail, but it may not hold many layers as well as lightly textured paper.
Can beginners make good colored pencil portraits?
Yes, beginners can make strong portraits if they start with simple subjects and focus on proportion, values, and layering. Progress usually comes faster when you practice one skill at a time instead of trying to master everything at once.
Conclusion
Colored pencil portraits combine patience, skill, and feeling in a way few other art forms can. They reward careful observation, smart layering, and a steady hand, while also leaving room for emotion and personal style. If you remember to focus on values, choose good materials, and build color slowly, your results will improve much faster.
The best way to grow with colored pencil portraits is to keep practicing with intention. Start small, study real faces, and learn from each piece you finish. If this guide helped you, explore more portrait techniques, try a new reference photo, or share your own results with other artists.